The Best Alternatives to Redbubble for Print on Demand Artists

alternatives to redbubble print on demand

In the ever-evolving landscape of the Print on Demand (POD) space, changes in popular platforms like Redbubble and Society6 have left many artists questioning their next move. With fees for artist plans and tiers becoming more common, the rise of AI art, and a general decline in sales, it’s crucial for artists to explore new opportunities. Despite these challenges, the POD industry still holds potential for artists in 2024 and beyond. This blog post aims to shed light on lesser-known alternatives to Redbubble and Society6, providing artists with fresh avenues to showcase and monetize their work.

*For a more comprehensive list of Print on Demand websites and suppliers worldwide, check out Print on Demand Central – it’s a great new resource for the POD space, you should check it out!

Alternatives to Redbubble and Society6 for Print on Demand

Zazzle

Zazzle is a versatile POD platform that stands out for its focus on customizable products. Artists can create templates from their designs, allowing customers to add their own text and/or photos to personalize the products further. This unique feature opens up new possibilities for collaboration between artists and buyers, fostering a more interactive and engaging experience. Learn more about selling your art on Zazzle.

create custom products on zazzle
Create customizable products on Zazzle.

CafePress

As one of the pioneers in the POD industry, CafePress has stood the test of time. What sets CafePress apart are its diverse product offerings, including some unconventional items like oven mitts and pot holders. Artists seeking a platform with a broad range of unique products may find CafePress to be a worthy alternative to explore.

Threadless

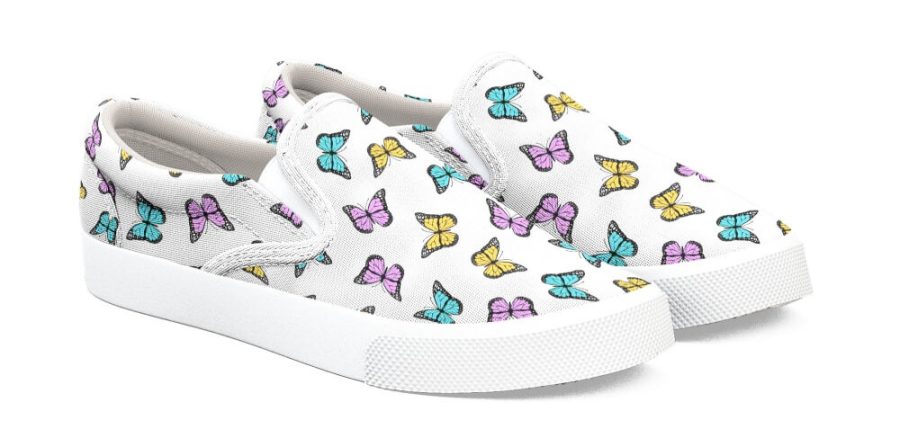
Threadless has carved its niche in the POD market by fostering a community-driven approach. Artists can submit their designs, which are then put up for community voting. The highest-rated designs get featured on various products. Threadless also allows artists to open their own storefronts, providing a platform to showcase and sell their work independently.

butterfly pattern shoes from threadless
Design shoes on Threadless

ArtsCase

ArtsCase specializes in protective cases for smartphones and other electronic devices. Artists can leverage this platform to turn their designs into functional, stylish accessories. With a focus on quality and protection, ArtsCase offers a unique avenue for artists to expand their product range beyond traditional prints.

Spoonflower

Spoonflower is a standout option for artists who want to explore the world of fabric and textile design. This POD platform enables artists to print their designs on various fabrics, allowing for the creation of custom textiles, wallpaper, and more. Spoonflower provides a unique opportunity for artists to venture into the realm of home décor and fashion. Learn more about selling your art on Spoonflower.

alternatives to redbubble - fabric swatches from spoonflower
Fabric swatches from Spoonflower

Design by Humans

Design by Humans takes a curated approach, featuring handpicked designs on a range of products. The platform emphasizes the quality of artwork and encourages artists to showcase their creativity on high-quality apparel, phone cases, and accessories. With a focus on artistic expression, Design by Humans offers a space for unique and visually striking designs.

Spring

Spring stands out by offering artists the ability to sell both physical POD products and digital downloads. This platform provides a seamless integration with YouTube channels, allowing artists to connect with their audience through multiple channels. The flexibility to sell digital downloads alongside physical products can be a valuable asset for artists exploring various revenue streams.

Displate

For artists with a penchant for metal art, Displate specializes in metal posters. This unique medium allows for durable and visually striking creations that stand out from traditional paper prints. Displate’s emphasis on metal as a canvas opens up new possibilities for artists looking to make a bold statement with their artwork.

Printful

For artists seeking full control over their online stores, integrating a print-on-demand service like Printful with their own website provides a seamless solution. With Printful handling all of the printing, packaging, and shipping, artists can focus on creating and promoting their artwork.

This integration allows artists to maintain their brand identity and customize their storefront to reflect their unique style. By offering a wide range of print-on-demand products, from apparel to home decor, artists can cater to diverse customer preferences.

Conclusion

As the POD landscape continues to evolve, exploring these alternatives can provide artists with fresh opportunities and avenues for success. While Redbubble and Society6 have paved the way, these lesser-known platforms offer unique features and product offerings that can cater to different artistic preferences and customer demographics.

Remember, adapting to change and diversifying your presence across multiple platforms can be the key to sustained success in the dynamic world of Print on Demand.


Cheers,

julie signing off

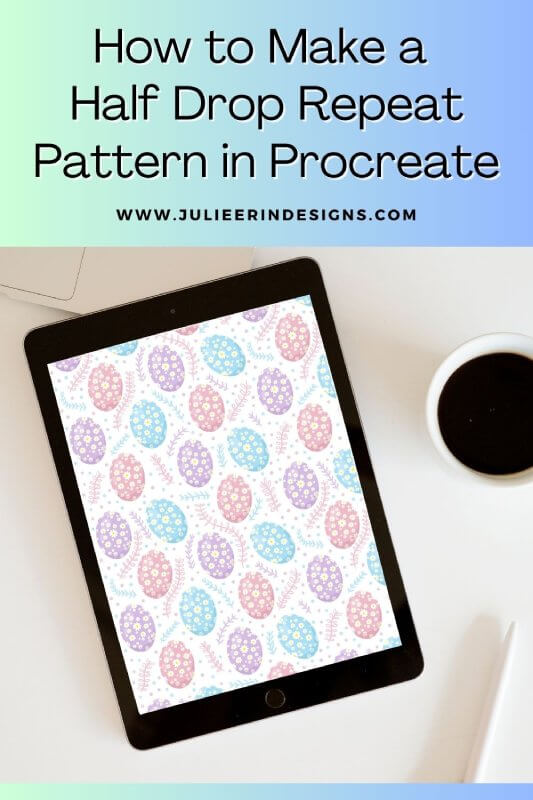
How to Make a Half Drop Repeat Pattern in Procreate

half drop repeat pattern procreate

Are you an aspiring digital artist or designer looking to master the art of creating seamless and visually appealing patterns on your iPad? In this step-by-step guide, we’ll explore how to design a half drop repeat pattern using the Procreate app, turning your ideas into beautifully tiled masterpieces.

You can watch my video below, or keep scrolling for a written guide.

How to Make a Half Drop Repeat Pattern in Procreate

Step 1: Set Up Your Canvas

Open Procreate on your iPad and create a new canvas. For pattern design, it’s crucial to choose a square canvas to ensure symmetry. A standard size like 3000×3000 pixels works well, but you can adjust according to your preference and needs.

Step 2: Draw your Motifs

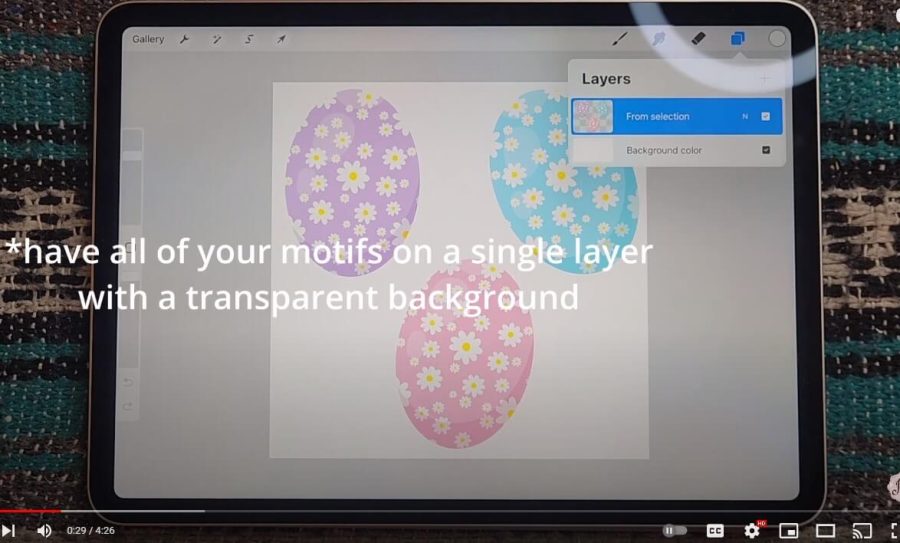
Use the Procreate brushes to sketch your motifs on the canvas. Whether it’s florals, geometrics, or abstract shapes, this is the stage to let your imagination run wild. Make sure your motifs are drawn or merged onto a single layer with a transparent background. Once you’re satisfied with the design, duplicate this layer and lock it so you preserve the original artwork.

how to make a half drop repeat pattern procreate

Step 3: Add Color to all 4 Corners of the Canvas

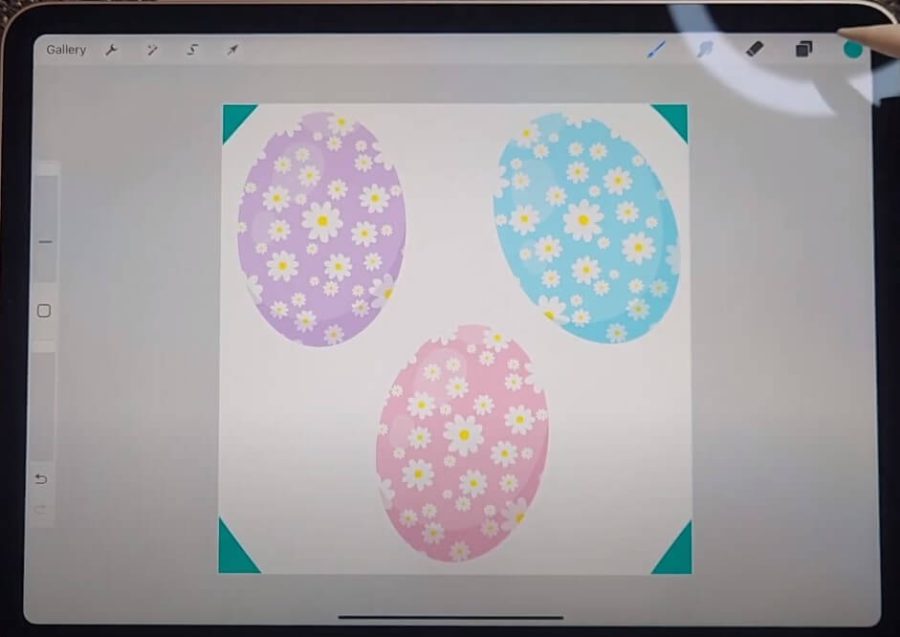
After finalizing your design, choose any color and apply it to each of the four corners of your duplicate layer, without overlapping your motifs. Ensure that you’re working on the same layer as your design. This will be erased later, but will enable us to use Snapping to create our half drop repeat pattern.

procreate repeat pattern tutorial

Step 4: Duplicate and Turn Snapping and Magnetics on

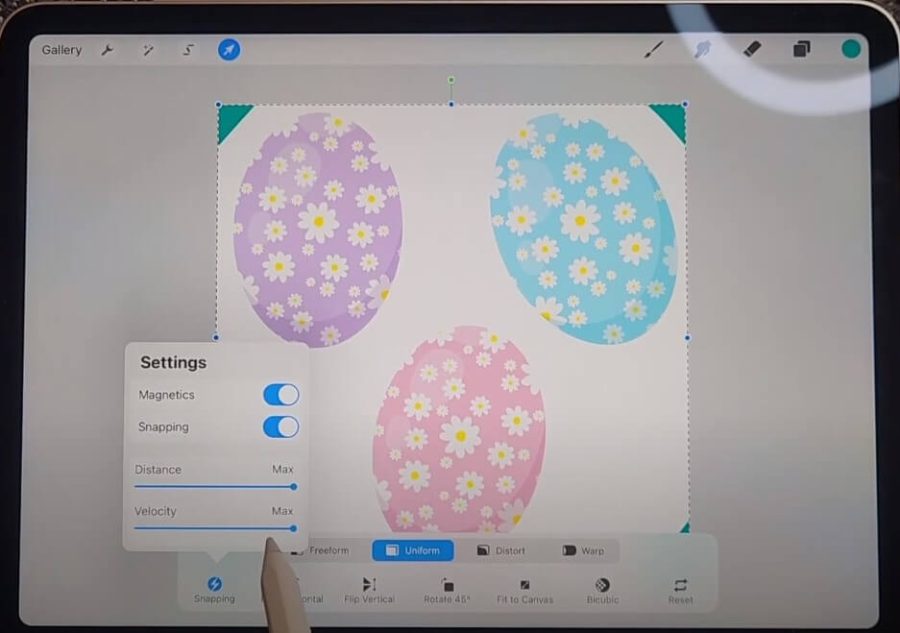
Duplicate this layer 4 times, so you should now have 5 copies in total. To do this, select the layer and swipe to the left, then select “Duplicate.”

Next, go to the move tool (arrow) and into the Snapping settings. Turn Magnetics and Snapping on and have the Distance and Velocity turned up all the way as high as they can go.

repeating pattern tutorial procreate

Step 4: Shrink and Snap the Layers into Place

Now, turn off all other layers except for the one you’re working on. Using the move tool to shrink it down from the corner until it snaps into place into the bottom left corner of the canvas, exactly 1/4 of the canvas.

Turn on the next layer, and snap it to the top left corner of the canvas, right above the first layer. Do the same with the next layer, shrinking it down to the bottom right corner of the canvas.

Now we will create our half drop by dragging this layer to the center of the right side of the canvas. You should see yellow lines in the center of your canvas which indicates you’ve snapped it to the right place.

half drop repeat pattern procreate

Step 5: Finish off Your Half Drop Pattern

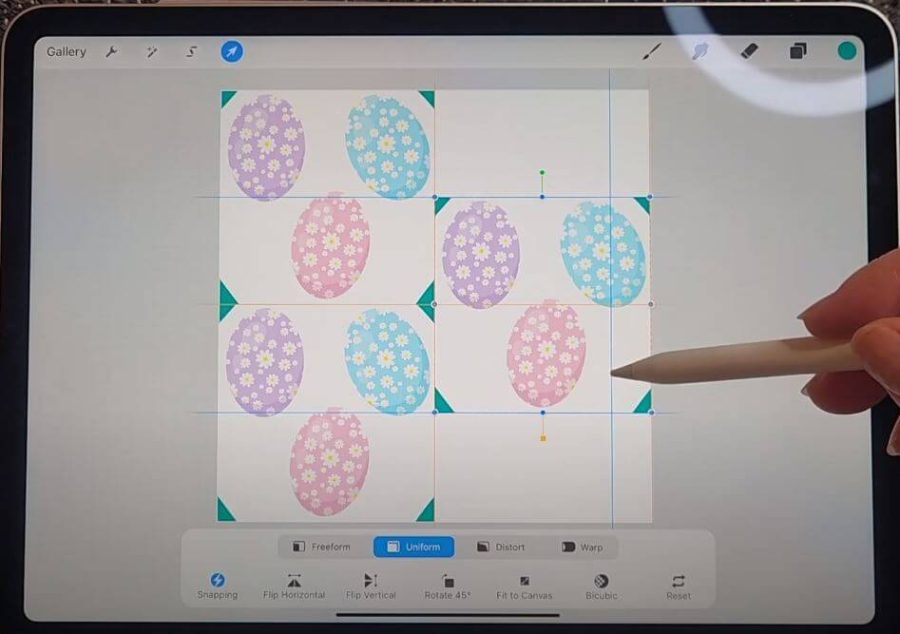
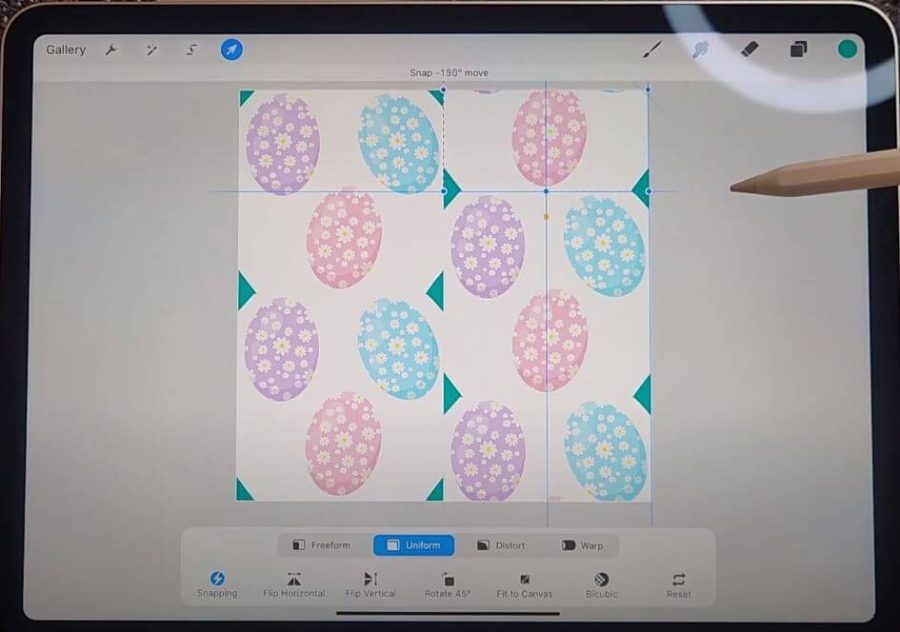
Shrink your next layer down into the bottom right corner and drag it down until it’s half way off the canvas and snaps to the bottom of your centered layer. The bottom half will get cut off, and that’s fine, it’s what we want.

Do the same thing with your final layer, but snap it to the top right of the canvas, then drag it up above that middle layer. The top half will get cut off, which again is what we want. Then, pinch all of the layers together. Finally, go in and erase those triangle markers, as they were simply to facilitate Snapping, and not part of our design.

finishing the half drop repeat

Step 6: Finalize the design

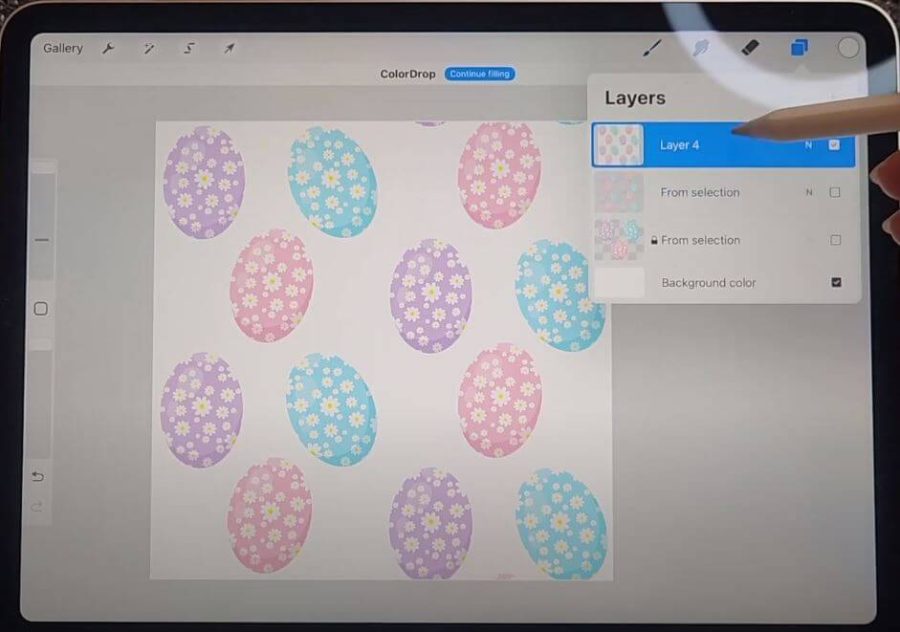
From here, you can go in and refine your pattern by adding some elements in between your motifs, or even moving your original motifs around a little bit. Just be careful not to go over any of the edges or move any of your motifs that spill over the edges.

Step 7: Test Your Repeat Pattern

Before finishing our design, it’s essential to make sure the repeat pattern is working correctly. To do this, first create a copy of your pattern tile. Then, add a new layer below this and fill it with a solid color, ideally one that you want to use as your pattern’s background. Pinch the 2 layers together into a single layer.

repeating patterns in procreate

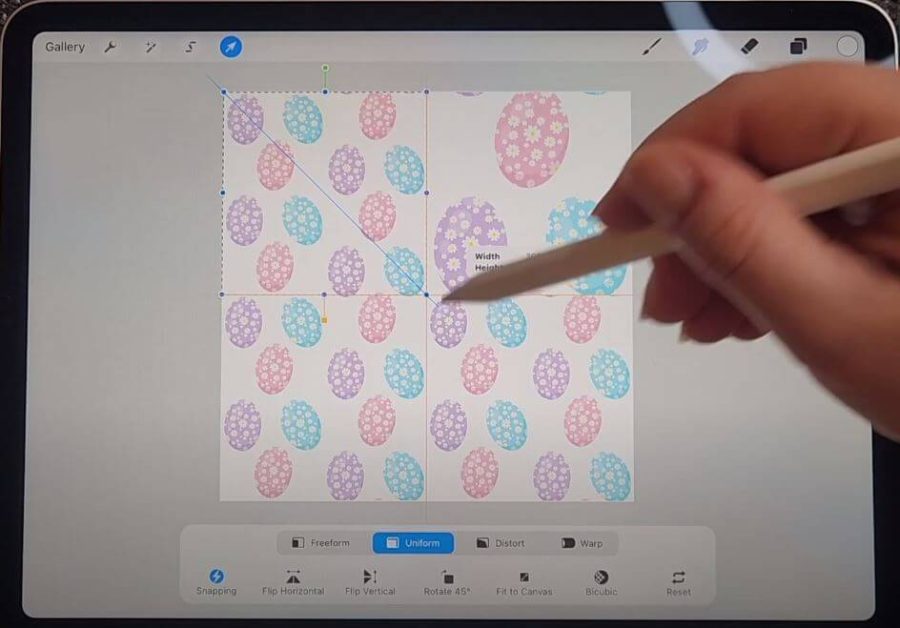
Duplicate this layer 3 times, so you have 4 copies in total. Using the move tool, with Snapping and Magnetics on, shrink each layer down and snap them to each of the 4 corners of the canvas. Make sure to snap them to the yellow lines, to ensure they line up correctly.

testing the repeat pattern procreate

Step 8: Finishing Touches

From here, you can zoom in and check the attachment points to ensure that your repeat is working correctly. You can go back to the original pattern tile and make adjustments If necessary, but you now have the basis for your half drop repeat pattern!


Creating a half drop repeat pattern in Procreate is a rewarding journey that allows you to unleash your artistic vision and apply your designs to an even wider array of products through Print on Demand websites. Remember, practice makes perfect, so don’t hesitate to experiment with different techniques and styles. With Procreate’s intuitive interface and powerful features, you’ll be crafting stunning patterns in no time. Happy creating!

Cheers,

julie signing off

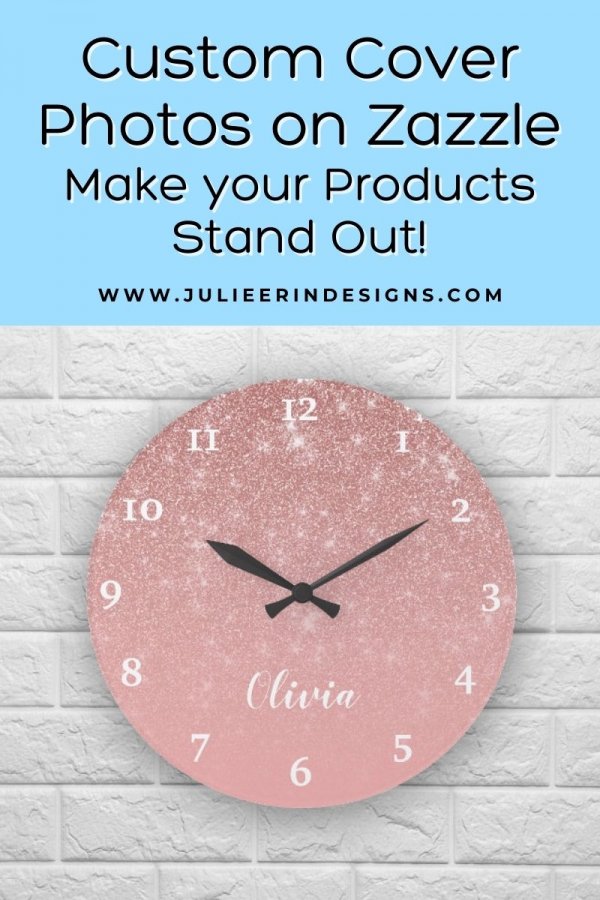
Custom Cover Photos on Zazzle: Make Your Products Stand Out

zazzle custom cover photos
custom cover photos on zazzle: make your products stand out

In this post I’m sharing a new feature on the print on demand website Zazzle, which is the ability to add your own custom cover photos to your listings! This is a really great way to make your listings stand out on the Zazzle marketplace.

* Please note, some links in this post are affiliate links. If you make a purchase using the links I may earn a commission at no additional cost to you. I appreciate your support and it helps me create more content for you to enjoy!

In a world filled with nearly identical products, it’s important to find ways to make your products stand out. Zazzle custom cover photos are one way to do this. With a little creativity, you can use cover photos to give your products a unique look and make them more reflective of your own brand.

Zazzle custom cover photos are easy to create and can be applied to any product via the individual product page. Cover photos can be changed at any time, so you can experiment with different looks to find the one that best represents your brand.

To learn more about the custom cover photos directly from Zazzle, read their cover photo landing page.

In the video below I demonstrate how to add custom cover photos to your listings, and how I’ve been designing them on my iPad. Aside from creating your own cover photos in Procreate or another app like Photoshop, you can also purchase or find free mockups for your listings on Placeit, Creative Market, Google and other websites.

A great way to make your products stand out from the competition.

When potential customers are browsing through all the different products on Zazzle’s marketplace, it’s the cover photo that will initially catch their eye. Therefore, it is important to have an eye-catching and visually appealing cover photo.

People are more likely to purchase a product if they are able to see what it looks like in a realistic setting. If you have a great product but are using unappealing or generic stock photos, then you are not doing your product justice. Take advantage of Zazzle’s custom cover photo feature to make your products stand out and attract more customers!

You can purchase a sample of your product and take your own photos of it, use a mock-up you’ve purchased, or create your cover photo in a graphic design software. Either way, adding a custom cover photo to your product will make it more eye-catching and likely to sell.

Use a variety of backgrounds and graphics to create a unique look for your product.

If you want your products to really stand out on Zazzle, you need to put some thought into your cover photos. Luckily, there’s a lot of flexibility when it comes to design. You can use a variety of backgrounds and graphics to create a unique look for your product.

The first thing you need to do is decide what kind of mood you want to create. Do you want something fun and whimsical? Or are you going for a more sleek and modern look? Once you’ve decided on the overall tone, you can start finding or creating some backgrounds and graphics. If you’re not sure where to start, take a look at what other people have done. See what kind of designs are popular and see if you can find any inspiration there. I’ve personally been using my own photographs, and actually going out and finding textures and photographing them specifically for cover photos.

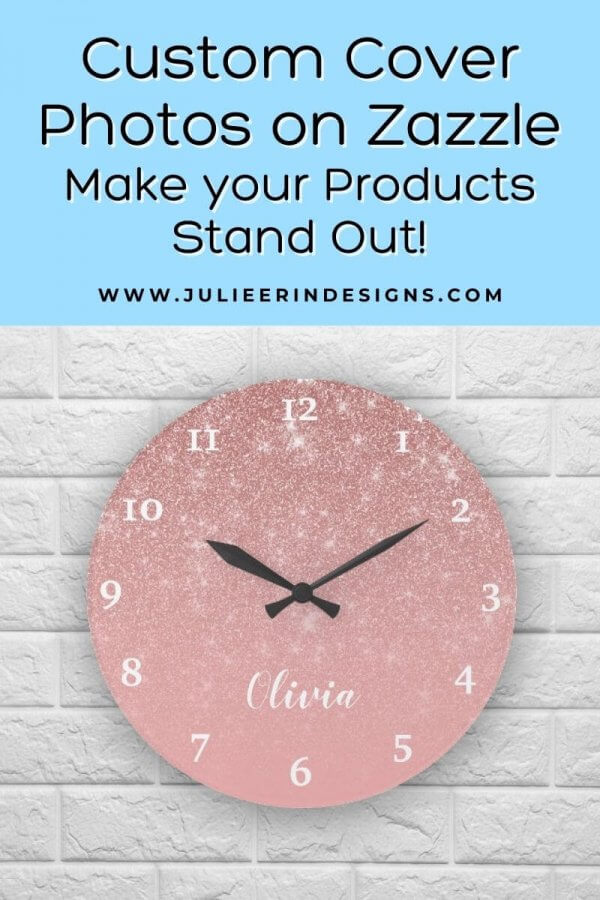
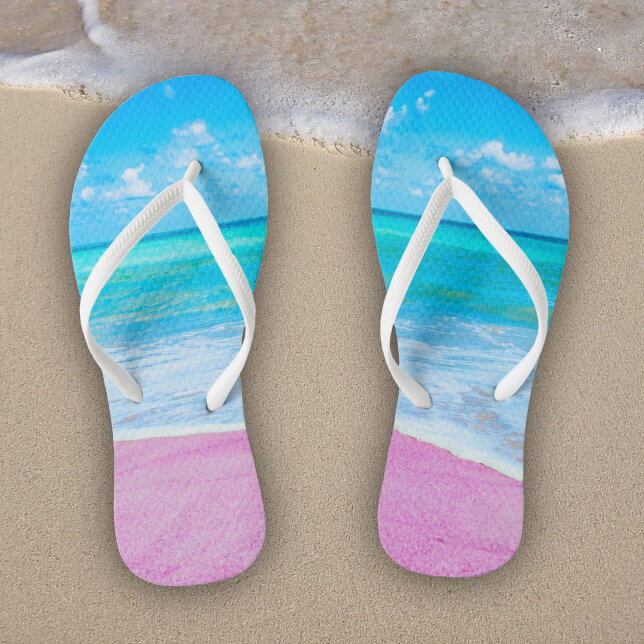
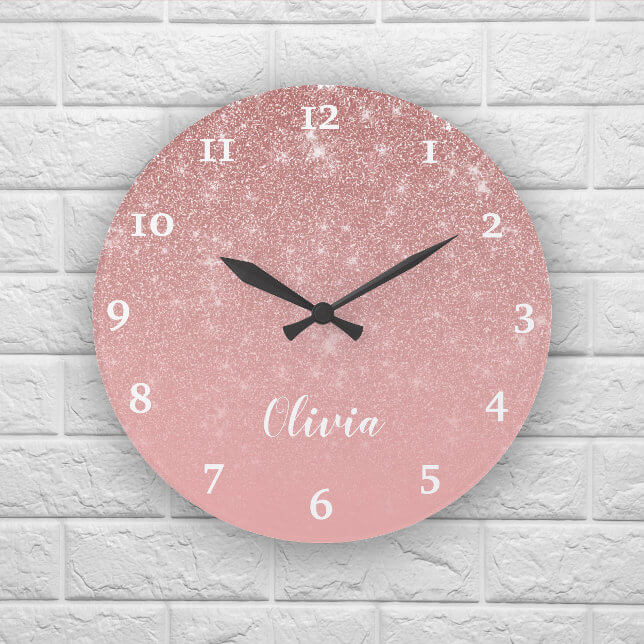
Also think about the real-life setting you might find the product being used in. For example, I used a sandy beach background for flip flops vs. a wall texture background for a clock.

zazzle custom cover photos for flip flops
custom zazzle cover photo clock mockup

Once you have a general idea of what you want your cover photos to look like, it’s time to start putting it all together. Remember, your cover photo is the first thing people will see when they come across your product. So make sure it’s something that will grab their attention and make them want to learn more. With a little effort, you can create a design that’s truly unique and will help your product stand out from the rest.

Keep your cover photos high quality and eye catching

There are a few things to keep in mind when creating custom cover photos for your products.

  1. Make sure the photo is high-quality and resolution. Zazzle recommends using a PNG or JPG file that is at least 300 DPI. This will ensure that your photo looks sharp and clear.
  2. Next, consider the size of the photo. You want to make sure that the photo is large enough, but not so big that it looks blurry or distorted. A good rule of thumb is to use a photo that is at least 1000 pixels wide.
  3. Finally, think about the background of the photo. You want to make sure that the background is simple and uncluttered so that your product is the main focus. A simple background, blurred photo or a contrasting solid color is usually best.

With these tips in mind, you can upload your own photos to create unique and eye-catching cover photos for your Zazzle products.

Conclusion

There are a few things to keep in mind if you want to use custom cover photos to make your products stand out. First, you want to make sure the cover photo is high-quality and fits well with the product. Second, you want the cover photo to be unique and not like anything else that’s out there. And finally, you want to make sure the cover photo accurately represents the product. If you keep these things in mind, then you’re well on your way to using custom cover photos to make your products stand out on Zazzle.

I hope this post has inspired you to add custom cover photos to your Zazzle listings. Go ahead and give it a try – you may be surprised at the results!

Cheers,

julie signing off

The Top 5 Ways for Artists to Make Money Online in 2024

top 5 ways artists can make money online 2024

Happy New Year friends! In this post I discuss the top 5 ways for artists to make money online in 2024 and beyond.

Of course, there are many different ways to make money online as an artist or creative professional. This is based on my own research and business earnings. I’ve been selling my own art online for over 8 years, and am now sharing my knowledge and experience with you!

I hope you will find this information helpful, and give you some ideas and inspiration for your own art business.

Watch the video below:

In this video I break down my art business earnings in 2022 to provide some insight into the best ways for artists to make money online in 2024 and beyond.

The top 5 ways artists can make money online in 2024 are:

  1. Print on Demand
  2. Digital goods and products
  3. Education
  4. Affiliate marketing
  5. Consulting and client projects

I go into a lot more depth on each point and show concrete examples in the video so make sure to watch until the end! Also consider subscribing to my Youtube channel as I don’t share every single video here on my blog.

Looking for even more inspiration on how to make money as an artist? Check out my post 101 Ways for Artists to Make Money – The Ultimate List

Let me know in the comments below what were your top income streams in 2022? I’d love to know more and keep the conversation going since the online space is constantly changing and different for everyone.

You might also be interested in these posts:

Wising you all the best and tons of success in 2024!


Cheers,

julie signing off

Top Tools and Resources for your Print on Demand Business

top tools for print on demand

If you want to start a print on demand business then you’ve come to the right place! I’ve created this list of the top tools for your print on demand business.

I’ve personally been selling my art through print on demand websites for over 8 years and have tried many different tools and approaches. In this post you’ll get all of the top tools and resources I’ve found for getting started with print on demand and scaling your business.

To get started selling your art online you’ll need to create some designs and optimize your artwork for print. Then, you’ll need to decide on a platform and upload your art or list your products there while using targeted key words to help them get found. Finally, you’ll need to market those products to your customers and continue learning to grow your business.

So let’s get into the top tools for your print on demand business!

Table of Contents

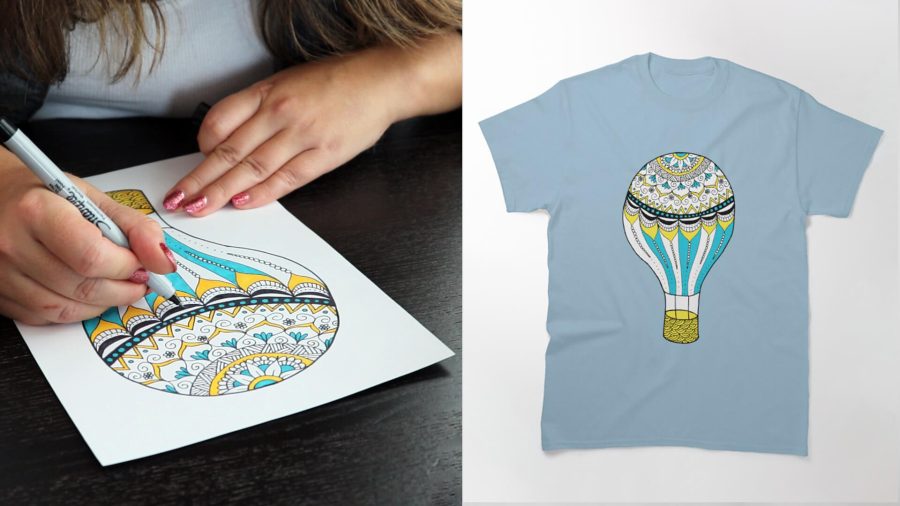
design to product

* Please note, some links are affiliate links. If you make a purchase using the links below I may earn a commission at no additional cost to you. I appreciate your support and it helps me create more content for you to enjoy!

Creating your Designs

First, you’ll need to create some designs or digitize your existing artwork so you can upload them to print on demand websites. Keep in mind the type of products you will be selling. A design for a t-shirt will much different than one for fabric for example.

Below are a few different (free and paid) design tools and resources for creating your designs for print on demand.

Websites to Sell Your Art

The next thing you’ll need to do is decide on one or more print on demand websites to sell your designs through. Below is a list of sites I’ve personally used and sold my art through.

  • Redbubble – Good for beginners
  • Zazzle – More advanced with customization options
  • TeePublic – Super simple upload process
  • Society6 – Tedious upload process but worth the effort
  • Amazon Merch on Demand – You must apply and wait to be accepted but worth it
  • Spoonflower – Sample purchase requirement in order to list for sale
  • Amazon KDP (Kindle Direct Publishing) – No application process
  • Printful – Via your own website or Etsy

Apps to Upload your Designs Faster

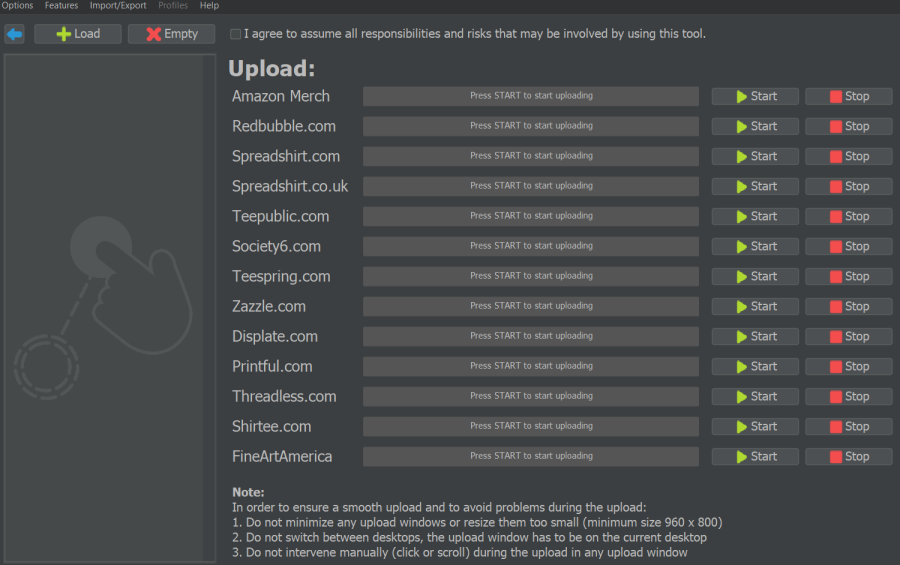
If you have a lot of designs ready to upload these are a few apps that you can use to speed up the process.

bulk print on demand flying upload
Preview of Flying Upload software dashboard and connected websites

Keyword and Niche Research

In order for people to find your products you’ll need to make sure you’re including key words that people are searching for! Include them in your title, tags and description. Here are some tools and resources to help you with this.

Marketing your Products

Marketing helps drive sales and raise awareness about your designs and the products you offer. You can do this in a variety of ways including through social media, Pinterest, blogging and more. Below are some excellent tools and resources to help you with your marketing efforts.

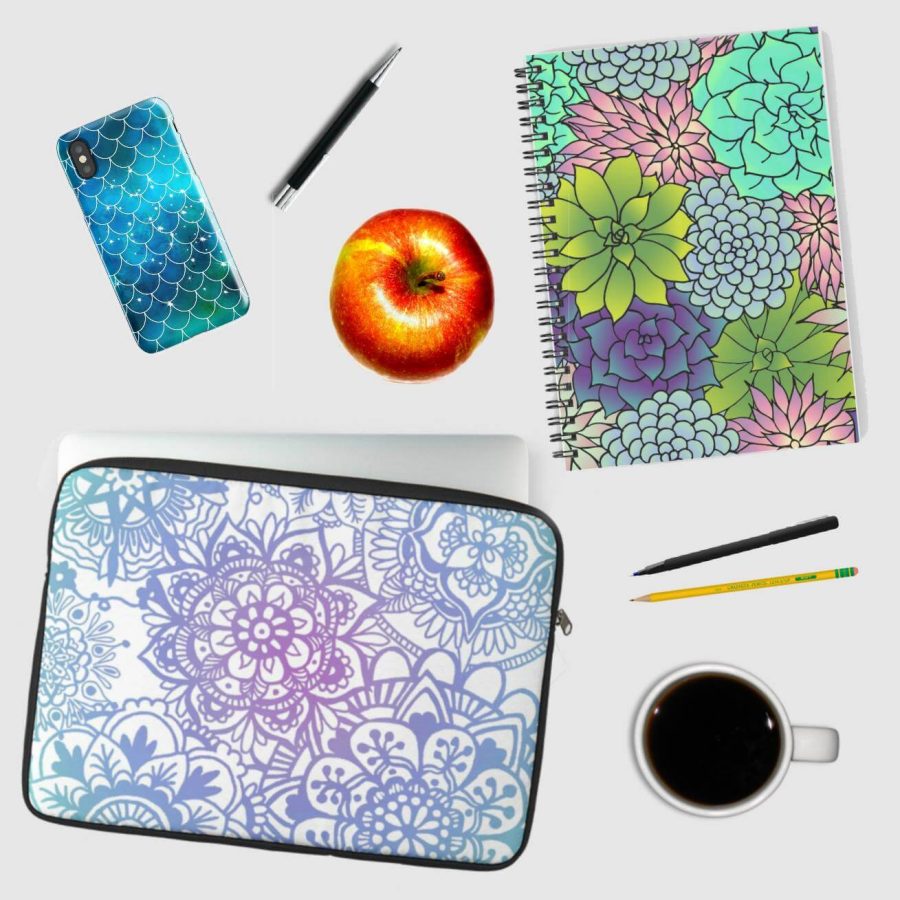
design mockups
Mockups like this can help drive sales

Business Tools and Resources

As your business grows you’ll need to implement good business practices like keeping track of finances, doing your taxes, building a website, email list and general organization.

I’ve recently created an all in one Art Business Toolkit to help you get your business started and organized!

Further Education

In order to grow your business you’ll need to continue learning and honing your skills in both design, marketing and overall business skills. There are many excellent resources out there, here are a few of my favourites!

Conclusion

There are so many resources and tools out there to help you grow your print on demand business. What was your favourite resource? Did I leave something out? Feel free to leave links below so we can all benefit.


Cheers,

julie signing off

How to Sell Your Print on Demand Products on Facebook

sell print on demand facebook page
sell print on demand products on facebook

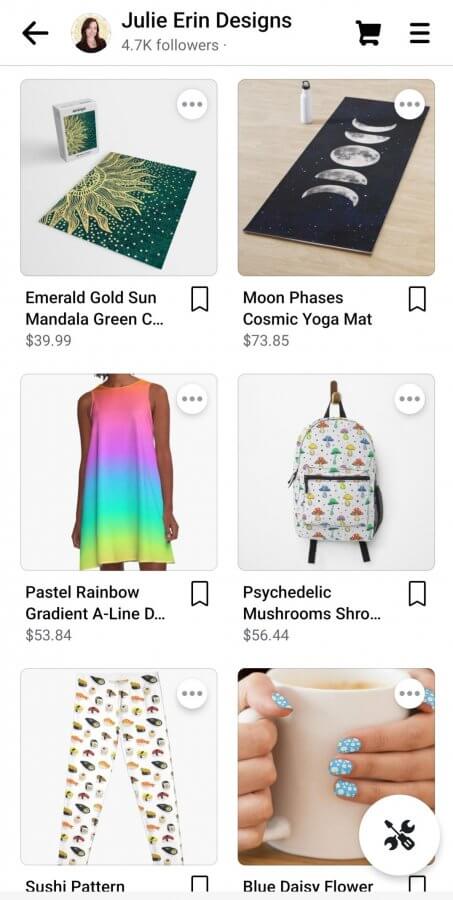
Do you want to start selling your print on demand products through social media? In this post I’m going to explain how you can sell your print on demand products, from multiple stores, on your Facebook page.

You can include products from multiple print on demand sites like Redbubble, Society6, Zazzle and more!

If you’re looking for how to sell your print on demand products specifically on Instagram, I have written a more detailed post on that. But this is the first step to that process.

The first step to being able to sell print on demand products on Facebook is to have a Facebook Page set up for your business. You’ll also need to have it set as a Business or Creator account.

If you don’t have a Facebook page for your business yet, you can also set it up at the same time as you are creating your shop.

sell print on demand products on facebook

Your page will have to meet their eligibility requirements including location and other criteria. It also helps if you have your own website domain to use as a primary domain (it does not have to be set up as a store, and you can still direct people to your print on demand links).

Here you can read more about making your page eligible for shopping on both Facebook and Instagram.

If you’re selling Print on Demand products through your own website using Shopify (or a similar service) you can use their partner connect option. This is more simple, but today I’m discussing how to add third party print on demand products from websites you don’t own, such as Redbubble or Society6.

How to set up a Facebook Store

Apply for shopping through the Commerce Manager (connected to your Business or Creator Facebook account)

Once you’ve applied and been approved for Shopping (this may take a few days for them to review your eligibility), head back over to the Commerce Manager. Now you can start adding products!

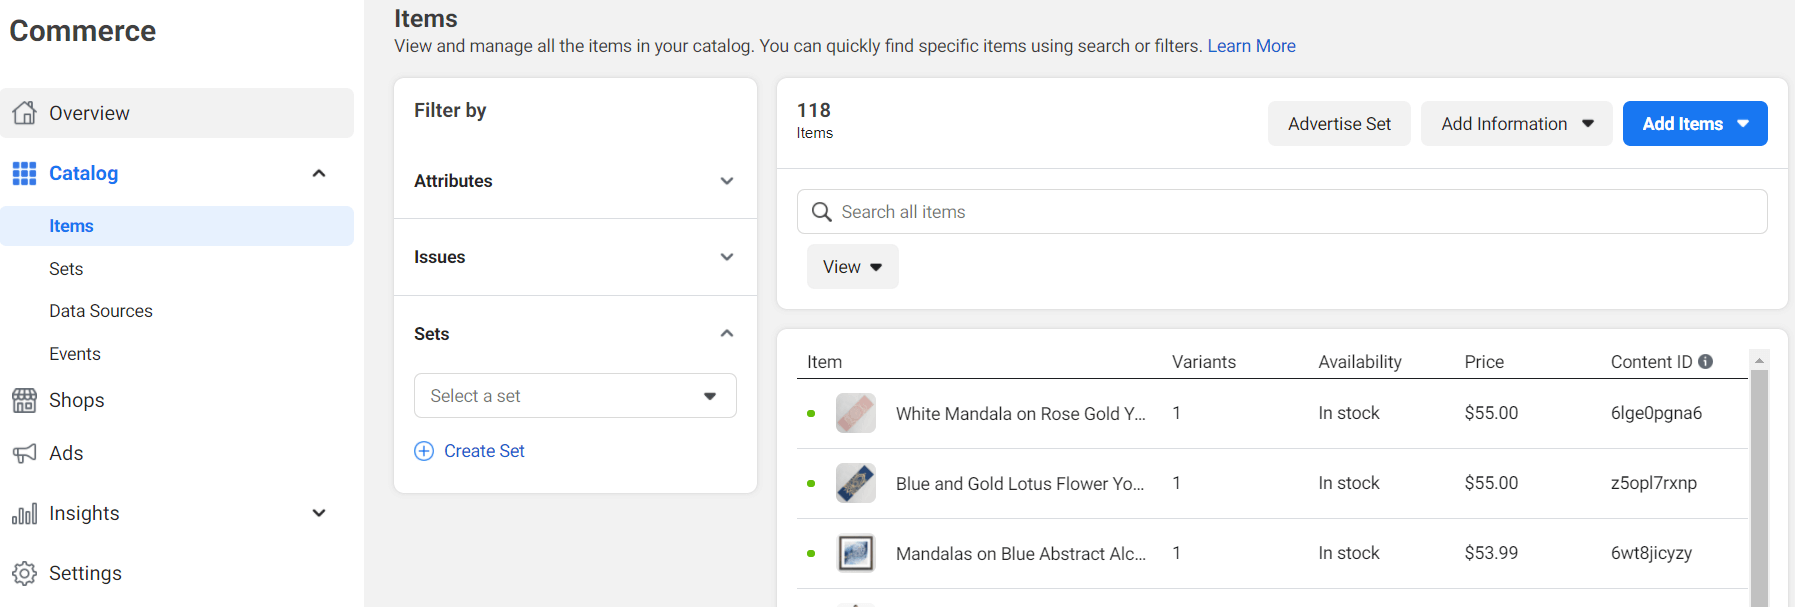
For this to work you will have to add products manually (Under Catalog > Items, then  Add Items > Add Multiple Items). This will give you a sort of spreadsheet which you can fill out with an image of your products, link, description, title etc. Fill out as much as you can here, but you don’t have to fill out everything.

Just add a couple of products to get started.

sell print on demand products on facebook

Now obviously this will take time since you may have hundreds or more products across multiple retailers. So I recommend starting by adding a few best sellers from each of your stores. This will drive people to those stores where they can browse the rest of your offerings from there.

After you’ve submitted your products it may take about 30 minutes to an hour for them to process before showing up in your Facebook store.

Tips for Selling Print on Demand Products on Facebook

  • Be patient, each step in the process takes time.
  • Familiarize yourself with the Commerce Manager and how it works.
  • Create “sets” to organize your products by product type.
  • You can also create collections to showcase on your storefront.
  • You can only use ONE currency in your store (ex. list everything in USD or your local currency).
  • Add a few of your best selling designs and products from your different stores.
  • Add a few products per week, or per month, or whatever you have time for. This can help drive traffic to your shop since they will show up on some people’s feeds.
  • Don’t add too many products at one time or it will spam people’s feeds and they may unfollow or miss the new items you’ve added.
  • You can’t tag these products in your photos unfortunately. This only works for products from a domain you own (such as a Shopify store).
  • Check the Insights section for analytics to see how many people are clicking on your products and visiting your stores!

I hope you’ve found this blog post useful! Make sure to follow my blog for more art business content in the future.


Cheers,
julie signing off

How to Sell Your Art on Spoonflower – and Cheapest Way to Get Samples!

how to sell your art on spoonflower

Are you an artist wondering how to sell your art on Spoonflower? You’ve come to the right place.

I’ve spent the last year uploading nearly 300 designs to Spoonflower. I’ve made over $1000 so far, so it’s definitely been worth it for me! And that’s why I wanted to share it with you today.

Spoonflower is a print on demand retailer, similar to Redbubble or Society6, who specialize in fabric featuring seamless pattern designs. But they also sell other products like wallpaper and home décor!

So if you’ve already got some seamless pattern designs that you’ve created, or you’re just starting to dabble with pattern design then Spoonflower is definitely worth taking a look at.

Completely new to seamless pattern design? I’ve got a couple of tutorials to help you out:

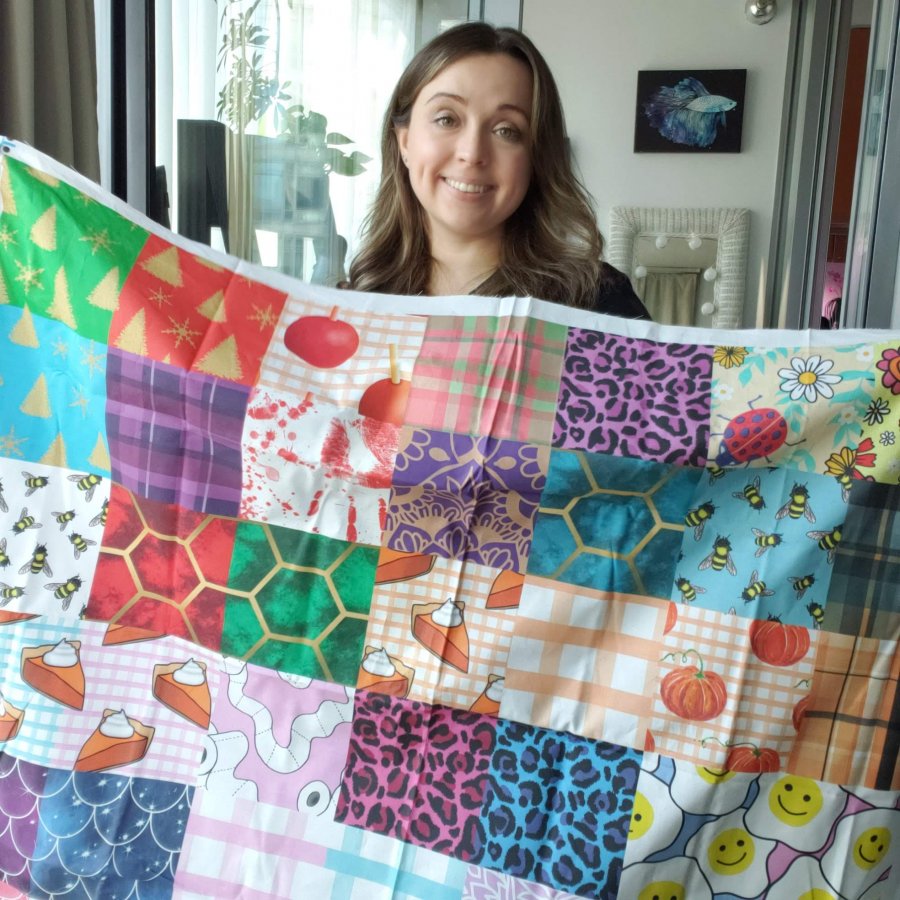
sell your art on spoonflower cheater quilt

How to Sell your Art on Spoonflower

Open a Spoonflower account and start uploading! It’s a pretty simple process to add your designs but there a few things you should know before getting started.

The main thing is that your designs won’t be enabled for sale in the marketplace until you have purchased samples.

I know, that sounds annoying, but I found a way to get the samples for really cheap so don’t worry about it too much. More on that below.

Store Front

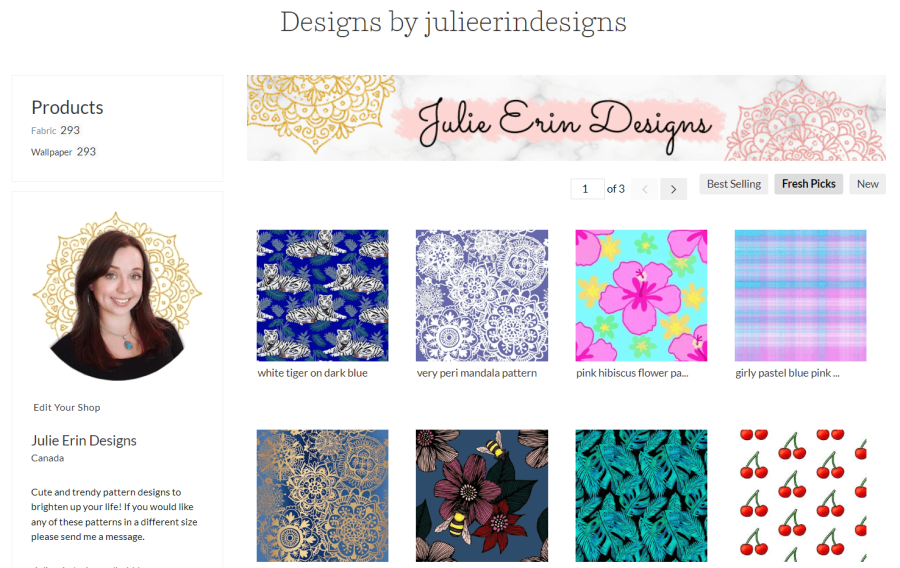
The store front shows the designs of yours that have been enabled for sale. You can customize it with a banner, profile photo, short intro/description and social links.

how to sell your art on spoonflower

If you want to view the designs that you have uploaded but have not enabled for sale yet, you can see them under Designs Not for Sale, or you can see them in your Dashboard.

Products

Spoonflower mainly sells fabric!

They cater to people who are looking for unique fabric to use for their own projects, either for personal use or even to sell in their own Etsy store for example. It’s really very satisfying to see people create things like clothing and accessories using fabric you’ve designed.

I’ve only ordered the cheapest possible fabric swatches and I don’t sew myself, so I can’t tell you much about the quality. However, they seem to have a broad range of fabric types for all sorts of projects. And plenty of return customers.

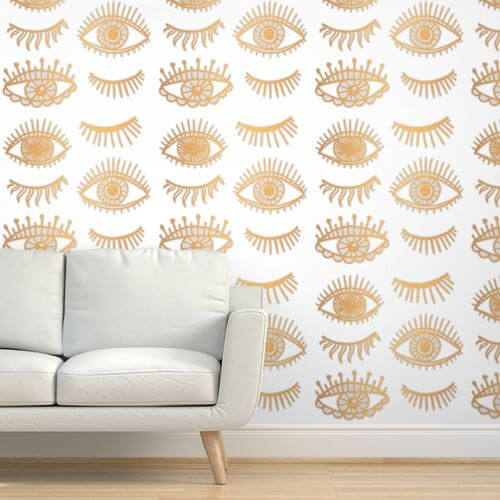
They also sell wallpaper and other home décor items like tablecloths, bedding and pillows which look really nice in the mockups, as you can see.

wallpaper from spoonflower

Ease of Upload

Uploading to Spoonflower can be a bit tricky. Your design MUST be a SEAMLESS pattern repeat. You can upload a non repeating pattern, but if someone buys it Spoonflower may contact you to fix it. So keep that in mind, I suggest to save yourself the headache and just check your patterns first.

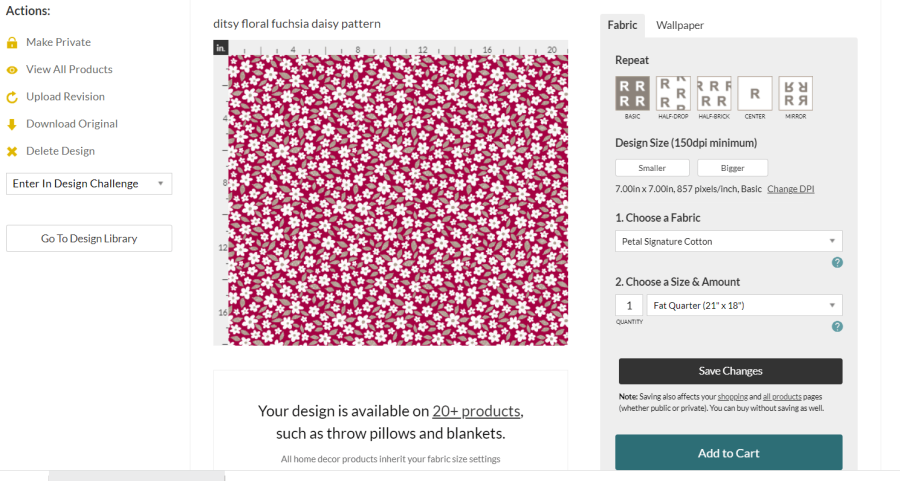
Below is what it looks like after your pattern has uploaded to the site. This is where you can add your title, description, tags, and edit the size and tiling of your print.

sell art on spoonflower upload

Underneath Design Size is where you can adjust the size of your pattern (Click Smaller or Bigger). Hit Save Changes and then you can click on where it says Your Design is available on 20+ Products to see how it looks on the mockups.

Wallpaper is on a separate tab, next to Fabric as you can see on the top. The wallpaper size can be changed separately and is not affected by any changes in the Fabric tab.

Once you’ve uploaded your design and added the title, tags and description, you have the option to make it public. This means people can see it, but they still can’t buy it until you order samples and enable them for sale.

The Cheapest Way to get Samples from Spoonflower

The cheapest way to get samples is by getting the “Cheater Quilt” which includes 42 different pattern swatches. The cost for one of these quilts is $18.50 USD (in April 2022).

I wouldn’t really call it a “quilt” in the way you might think, and it probably won’t be too pretty unless all of your patterns match nicely together. Mine definitely don’t!

What I suggest doing is wait until you have uploaded 42 designs and then order the quilt, then you can go through and enable all of your patterns for sale at once.

Below is a photo of one of my ugly cheater quilts with bonus appearance by Miss Kitty!

spoonflower samples with kitty

The whole buying samples thing sounds annoying but I actually think it’s a good thing. This barrier to entry means you kind of have to be a serious artist to open up a shop.

I find that it keeps out the people who are just trying to make a quick buck with sub par or stolen designs. It also means less competition and higher quality designs overall.

In this video I demonstrate step by step how to set up and purchase the cheater quilt from Spoonflower.

Earnings and Payment

Spoonflower pays twice per month if you reach the $10 threshold by the payout date.

The payment dates are around mid month and again near end of the month. This is actually much faster than other Print on Demand sites that can make you wait months for your earnings to clear. They pay via Paypal.

I’ve had some orders cancelled after they had already paid me, in which case they just deducted it from my future earnings. So, no big deal.

Marketing

Spoonflower will market their top selling designs, and also new art that is submitted to the Spoonflower Design Challenges and ranks near the top. I highly recommend entering these challenges to help you get more exposure to both the people who work at Spoonflower and potential customers.

There is also a hashtag for challenge entries on Instagram which is a great way to participate in the community: #SpoonflowerDesignChallenge.

It’s easy to pin images to Pinterest from their site, so that helps for marketing. They have several stunning mockups which look great on social media.

However, most people just seem to find my designs through searching on Spoonflower’s marketplace. So having good key words and SEO, accurately describing your design helps a lot.

Shipping

Spoonflower is located in the U.S. and I have found they offer reasonable shipping costs to Canada, and even more reasonable within the U.S.  The shipping is generally pretty quick, and you can choose a faster shipping method if desired. Sometimes they even have free shipping promotions which work for Canada, however, I’m not sure about overseas.

Conclusion

While I was skeptical about Spoonflower at first due to the barrier to entry with the purchase of samples, it’s actually a great platform for artists to sell their art online and join a community of other creative people.

However, it is more for someone who designs seamless patterns, and serious artists who have a little bit of money to invest in their art business.

I hope this article has helped you learn how to sell your art on Spoonflower, and decide if it’s right for you!


Cheers,

julie signing off

Society6 Can Cooler Review

society6 can cooler review

Since summer is in full swing I thought it’d be a good time to do a Society6 can cooler review.

I’ve had them for a few years now and they’re pretty awesome!

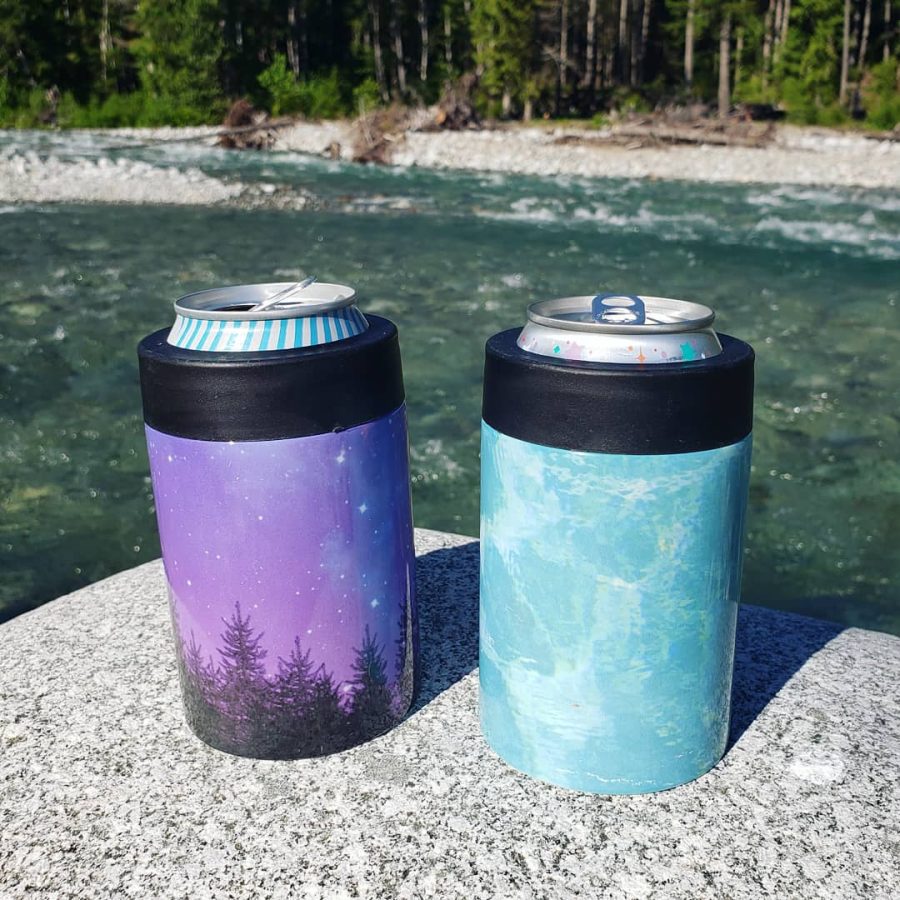
These can coolers, also known as can koozies or coozies, live in my “camping box” and get tossed around quite a bit. They’ve been on several camping trips and beach days with me.

society6 can cooler review

I’m pleased to say the designs have held up nicely, as you can see from the photos!

But the main thing is how well do they work? They insulate very well. Like 30 degrees on the beach (85 F) and I can finish the whole drink while it stays cool well. To me that is a total win. I no longer have to pour out the rest of my drink because it got warm and gross.

The Society6 can coolers are are also very light weight. This makes them perfect to throw into a beach bag or take on a backpacking trip.

society6 can cooler review

As you can see they can fit both regular sized cans as well as bottles!

Society6 Can Cooler Features (according to their website)

  • Holds a 12 oz can
  • Lightweight stainless steel construction
  • 360 degree wraparound artwork
  • Double-wall vacuum insulation to keep drinks cold or hot for hours
  • Includes plastic twist-on top
  • Hand wash only

They are perfect for camping, taking to the beach, backyard BBQs or any other time you need to keep your drink insulated.

And did I mention these can coolers feature my own designs?

turquoise water purple galaxy drink koozies

If you like these designs you can find them in my Society6 shop! They have thousands of other designs so there is truly something for everyone.

If you liked this post you may also enjoy my other product reviews:

Cheers,

julie signing off

Zazzle Design Tool Tips and Tricks

zazzle design tool tips and tricks

Do you struggle with the Zazzle design tool or just want to know how to get started creating products on Zazzle? Many people do, so I created this video to help!

If I’m going too quickly for you, feel free to pause or even decrease the video speed so you can absorb all of the information because there is a lot.

In this video I demonstrate:

  • How to navigate to the proper Create section to make items for sale
  • Adding your own images to products.
  • Use of transparent (.png) images to speed up creation.
  • Using filters.
  • Using layers to maximize creation.
  • Creating a customize-able template with text.
  • Copy and Paste function to speed up creation.
  • Using guidelines.
  • Changing the font of the text.
  • Creating patterns and a weird glitch to be aware of (with workaround).
  • Using the new masking tool.

I hope you will find this information helpful and feel more confident with using the Zazzle design tool now. If you have any other questions about how the design tool works feel free to leave a comment below so I can address it here or in a future video.


Looking for more Zazzle tips? Check out my Youtube playlist with all of my Zazzle videos:


Other posts you may be interested in:

Cheers,
julie signing off

How to Set up an Instagram Shop with Print on Demand Products

how to set up an instagram shop with print on demand
how to set up instagram shop print on demand

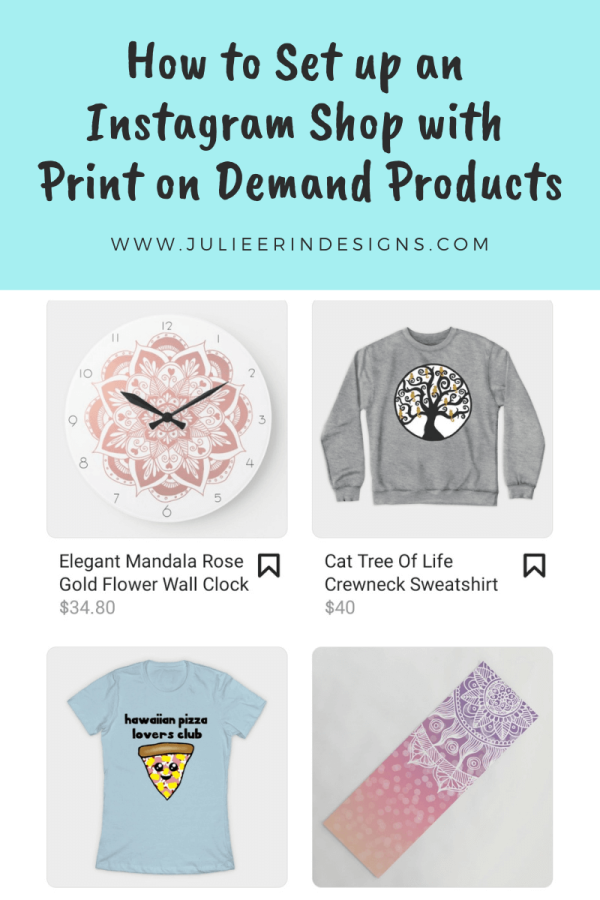
Today I’m going to explain how to set up an Instagram shop with Print on Demand products from websites like Redbubble, Society6 and Zazzle.

Did you know that you can add your print on demand products to a shop on your Instagram page? Since I did this I’ve seen an increase in traffic to my stores from Instagram.

The main thing you need to know is that you have to set it up through Facebook.

First of all you need to make sure your Instagram account is a Business or Creator account. You also need to have business Facebook page for your brand connected to it.

Then you can create a store through the Facebook Commerce Manager (click on Add Shop).

If you’re selling Print on Demand products through your own website using Shopify (or similar) you can use their partner connect option. This is more simple, but today I’m discussing adding third party print on demand products from websites you don’t own like Redbubble and Society6.

how to set up instagram shop print on demand

Once you’ve created the store on Facebook, go back into your Instagram account and apply for Instagram Shopping under the Settings section of your profile. There should a Business or Creator section under which you should see Shopping. Apply for Shopping and wait for your account to be approved.

Once you’ve been approved (it may take a few days) head back over to the shop you created on your Facebook page. Now you can start adding products!

For this to work you have to add products manually (click on Add Items). Now obviously this will take time since you may have THOUSANDS of products across multiple retailers. So I recommend highlighting a few best sellers from each of your stores. This will at least drive people to those stores where they can browse the rest of your offerings from there.

how to set up instagram shop print on demand

It will take about 30 minutes to an hour for products to process but then you will start to see them showing up in your Instagram and Facebook stores.

Tips for Setting up Your Instagram Store

  • Be patient.
  • Take the time to familiarize yourself with the Commerce Manager and how it works.
  • Create “sets” to organize your products by product type.
  • You can only use ONE currency in your store. I had an issue with products not showing up and realized it was because I had multiple currencies.
  • Add a few of your best selling designs and products from your different stores.
  • You won’t be able to “tag” these products in your Instagram photos unfortunately. This only works for products from a domain you own (such as a Shopify store).
  • Products are shareable to Instagram Stories or direct message.
  • Check the Insights section for analytics to see how many people are clicking on your products and visiting your stores!

I hope this post has been helpful to explain how you can set up an Instagram shop with your print on demand products.

I’d love to hear what you think about this and if you will be using it for your own products!


Happy selling!

Cheers,
julie signing off

Other posts you may find interesting: