
Are you an aspiring digital artist or designer looking to master the art of creating seamless and visually appealing patterns on your iPad? In this step-by-step guide, we’ll explore how to design a half drop repeat pattern using the Procreate app, turning your ideas into beautifully tiled masterpieces.
You can watch my video below, or keep scrolling for a written guide.
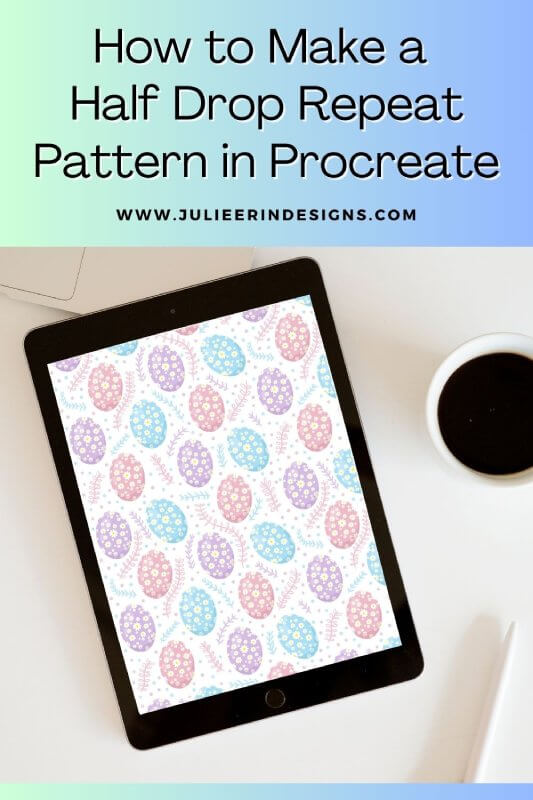
How to Make a Half Drop Repeat Pattern in Procreate
Step 1: Set Up Your Canvas
Open Procreate on your iPad and create a new canvas. For pattern design, it’s crucial to choose a square canvas to ensure symmetry. A standard size like 3000×3000 pixels works well, but you can adjust according to your preference and needs.
Step 2: Draw your Motifs
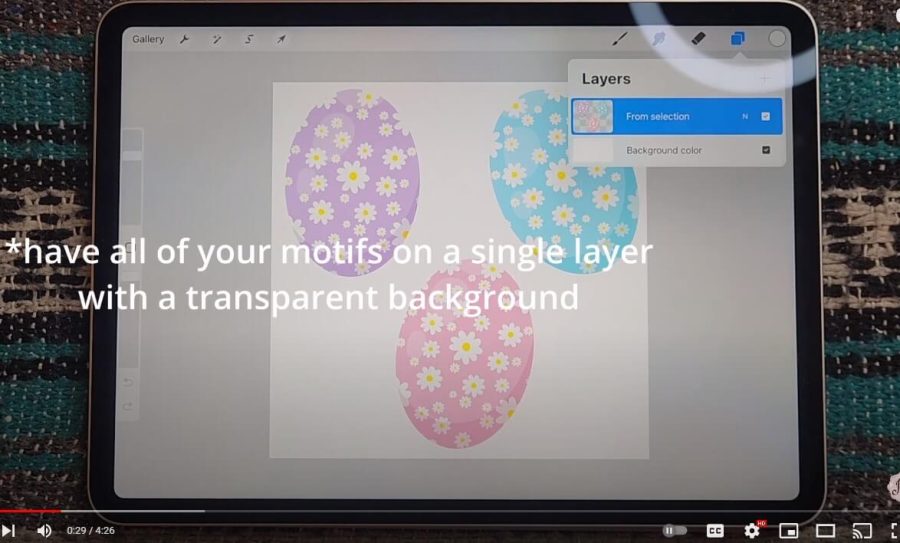
Use the Procreate brushes to sketch your motifs on the canvas. Whether it’s florals, geometrics, or abstract shapes, this is the stage to let your imagination run wild. Make sure your motifs are drawn or merged onto a single layer with a transparent background. Once you’re satisfied with the design, duplicate this layer and lock it so you preserve the original artwork.
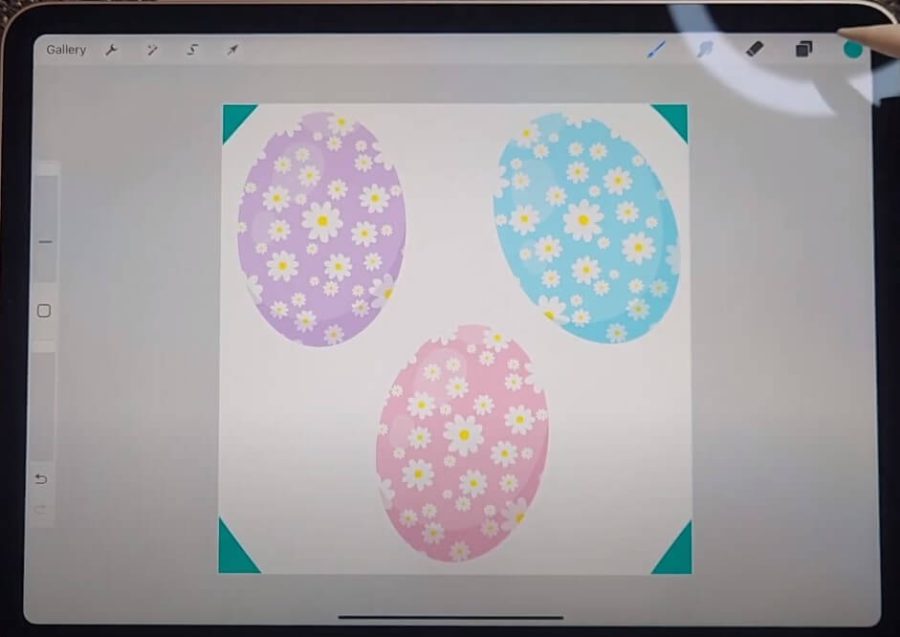
Step 3: Add Color to all 4 Corners of the Canvas
After finalizing your design, choose any color and apply it to each of the four corners of your duplicate layer, without overlapping your motifs. Ensure that you’re working on the same layer as your design. This will be erased later, but will enable us to use Snapping to create our half drop repeat pattern.
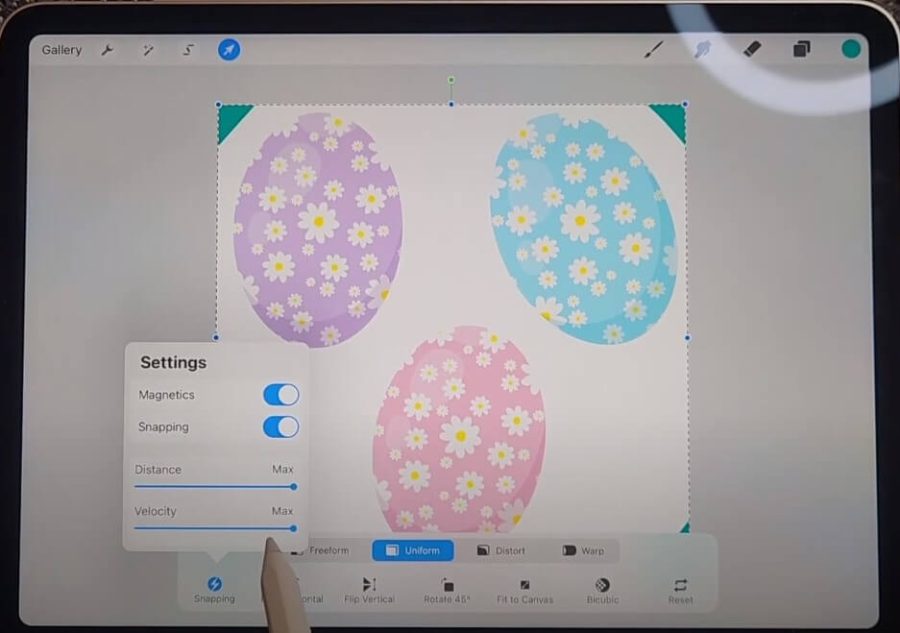
Step 4: Duplicate and Turn Snapping and Magnetics on
Duplicate this layer 4 times, so you should now have 5 copies in total. To do this, select the layer and swipe to the left, then select “Duplicate.”
Next, go to the move tool (arrow) and into the Snapping settings. Turn Magnetics and Snapping on and have the Distance and Velocity turned up all the way as high as they can go.
Step 4: Shrink and Snap the Layers into Place
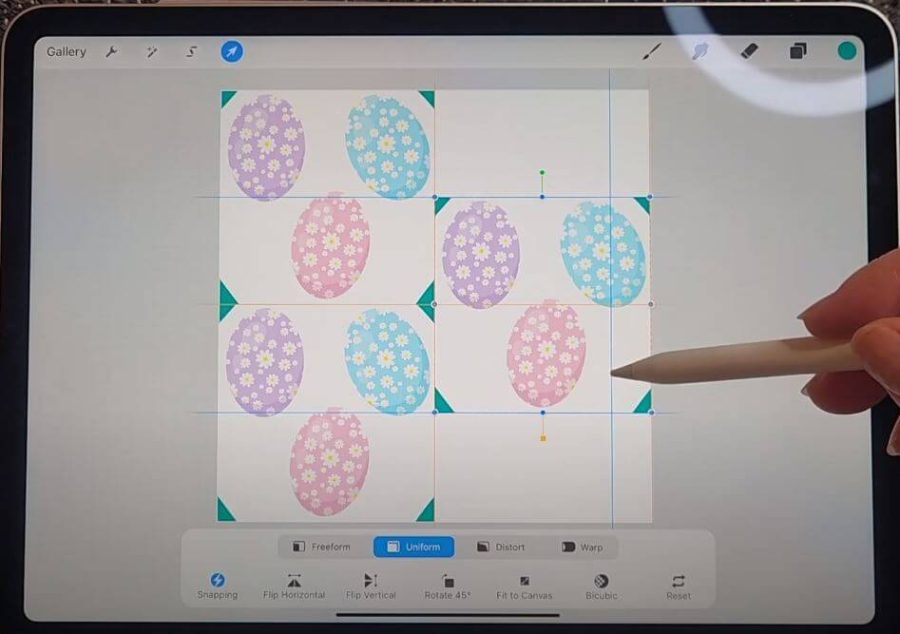
Now, turn off all other layers except for the one you’re working on. Using the move tool to shrink it down from the corner until it snaps into place into the bottom left corner of the canvas, exactly 1/4 of the canvas.
Turn on the next layer, and snap it to the top left corner of the canvas, right above the first layer. Do the same with the next layer, shrinking it down to the bottom right corner of the canvas.
Now we will create our half drop by dragging this layer to the center of the right side of the canvas. You should see yellow lines in the center of your canvas which indicates you’ve snapped it to the right place.
Step 5: Finish off Your Half Drop Pattern
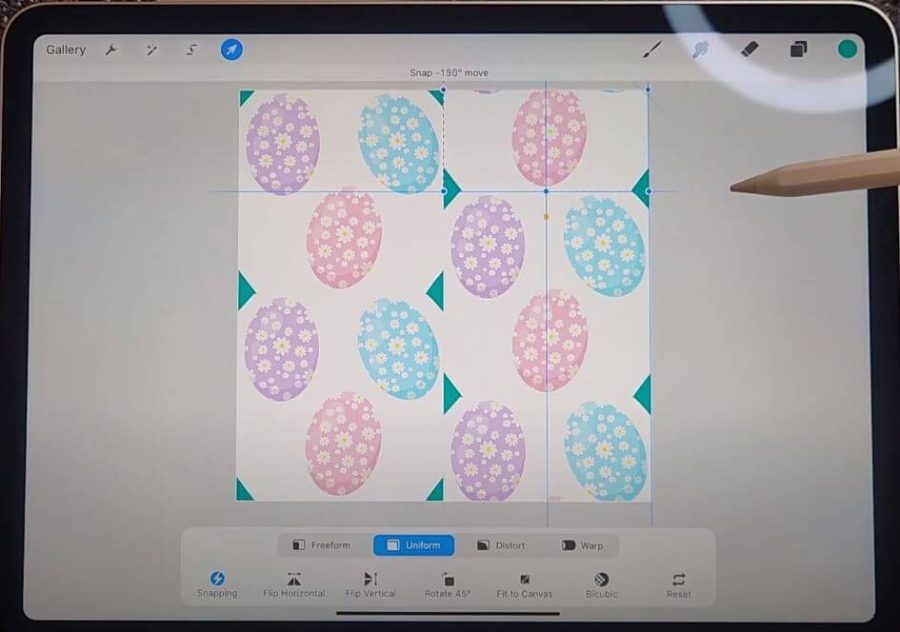
Shrink your next layer down into the bottom right corner and drag it down until it’s half way off the canvas and snaps to the bottom of your centered layer. The bottom half will get cut off, and that’s fine, it’s what we want.
Do the same thing with your final layer, but snap it to the top right of the canvas, then drag it up above that middle layer. The top half will get cut off, which again is what we want. Then, pinch all of the layers together. Finally, go in and erase those triangle markers, as they were simply to facilitate Snapping, and not part of our design.
Step 6: Finalize the design
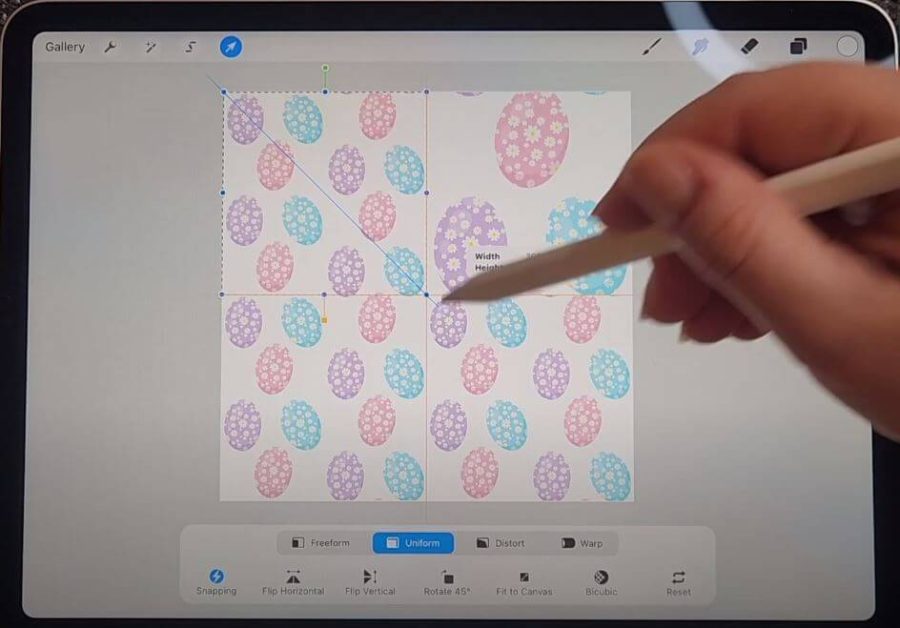
From here, you can go in and refine your pattern by adding some elements in between your motifs, or even moving your original motifs around a little bit. Just be careful not to go over any of the edges or move any of your motifs that spill over the edges.
Step 7: Test Your Repeat Pattern
Before finishing our design, it’s essential to make sure the repeat pattern is working correctly. To do this, first create a copy of your pattern tile. Then, add a new layer below this and fill it with a solid color, ideally one that you want to use as your pattern’s background. Pinch the 2 layers together into a single layer.

Duplicate this layer 3 times, so you have 4 copies in total. Using the move tool, with Snapping and Magnetics on, shrink each layer down and snap them to each of the 4 corners of the canvas. Make sure to snap them to the yellow lines, to ensure they line up correctly.
I’ve also created a free Pattern Preview Tool to help you test your repeat patterns if you want to skip this step!
Step 8: Finishing Touches
From here, you can zoom in and check the attachment points to ensure that your repeat is working correctly. You can go back to the original pattern tile and make adjustments If necessary, but you now have the basis for your half drop repeat pattern!
Creating a half drop repeat pattern in Procreate is a rewarding journey that allows you to unleash your artistic vision and apply your designs to an even wider array of products through Print on Demand websites. Remember, practice makes perfect, so don’t hesitate to experiment with different techniques and styles. With Procreate’s intuitive interface and powerful features, you’ll be crafting stunning patterns in no time. Happy creating!
Cheers,


its like a grid.
Hi there! Yes, grids are very handy for creating seamless pattern designs.