Selling your art on POD websites – Zazzle vs Redbubble

zazzle vs redbubble for selling art online

Today I will be comparing Zazzle vs Redbubble for selling art online. Zazzle and Redbubble are two popular Print on Demand marketplaces where artists can upload their designs for sale on a variety of products.

They may seem like pretty much the same thing, however there are actually some pretty major differences between these 2 platforms which you should know before opening a shop.

I have been selling my designs on both Redbubble and Zazzle for many years now. Read on for my overview and comparison to help you decide where to sell your artwork online.

Zazzle vs Redbubble

Audience

Zazzle’s audience is mostly women aged 25+, in the United States but also worldwide. They cater to people looking for unique gifts, brides-to-be, and customize-able paper products like invitations, greeting cards, and business cards. They also have a wide range of unique items from home décor and accessories to edible brownies!

Redbubble’s audience is younger than Zazzle and more hip, with humorous t-shirt designs, trendy patterns and quotes being the norm. Stickers are extremely popular with teenagers and young adults. They also focus on selling unique gifts including apparel, accessories and home décor. Redbubble’s headquarters is actually in Australia but they have a worldwide presence.

betta fish sticker from redbubble
A sticker from Redbubble

Store Front

Zazzle vs Redbubble’s store fronts are quite different.

Redbubble’s storefront displays a randomly generated selection of products featuring your most popular designs, based on their algorithm. All you need to do is add your logo, header and bio to set it up. It’s much more beginner friendly than Zazzle’s.

However, your Zazzle store front is much more customize-able. The layout is left completely up to you. You’ll need to go into the store’s Settings tab under Advanced Settings to add the available sections to your home page including Categories, Featured Collections and Recently Created Products. I recommend taking this step to set it up properly.

flip flops on zazzle
You can put your art on flip flops on Zazzle!

Uploading Designs

Redbubble is much quicker to upload designs to, and you can upload to all of their products in one go. You can also add a custom background colour and create patterns in the tool. However, there is no option to add customize-able text like Zazzle has.

On Zazzle it is best to upload each product one by one. This does take an extremely long time but it’s quality over quantity here. You can start with just a small range of products so as not to get overwhelmed.

Zazzle’s design tool is more like a mini Photoshop where you can add layers, text, templates etc. and create customize-able products. I made this video with some tips about using Zazzle’s design tool which you may find helpful.

Products

I’ve ordered products from both Zazzle and Society6, and everything has been pretty good.

I slightly prefer Redbubble just due to the types of products I got, like apparel, but Zazzle has a much wider range of items available.

Here is a video I made reviewing a whole bunch of the products I’ve bought from Redbubble. I don’t have as many from Zazzle so I haven’t made a video on those yet but might show them in future. I’ve also shared photos of products I received on my Instagram.

Earnings

Royalty margins are higher on Redbubble, and I’ve personally made more money there.

However, I know others who do extremely well on Zazzle, especially making cards, invitations, stationary and designing for the wedding market.

Zazzle also has a new Promoter Program where you can get 35% for referral sales of your own products, and 15% on other people’s products. There is also the potential to get bulk orders if you designs things like wedding invitations and stationary, which is actually a huge market on Zazzle.

Zazzle pays you on the 15th of the month after you reach $50 in cleared earnings. Redbubble has a payment threshold of $20, also paid on or around the 15th of every month.

Summary of Zazzle vs Redbubble

In sum, Redbubble is a much easier and faster marketplace to upload your designs, especially for beginners or artists who create more graphic and/or pattern designs. However, Zazzle has a huge potential for customize-able products, greeting cards, invitations and stationary. So which one is best for you will depend on your art style and business goals.

I hope the above information has been helpful for you. If you’d like to receive more Print on Demand education, and keep up with my latest designs and projects, consider subscribing to my e-mail list!


Further reading:

Cheers,

julie signing off

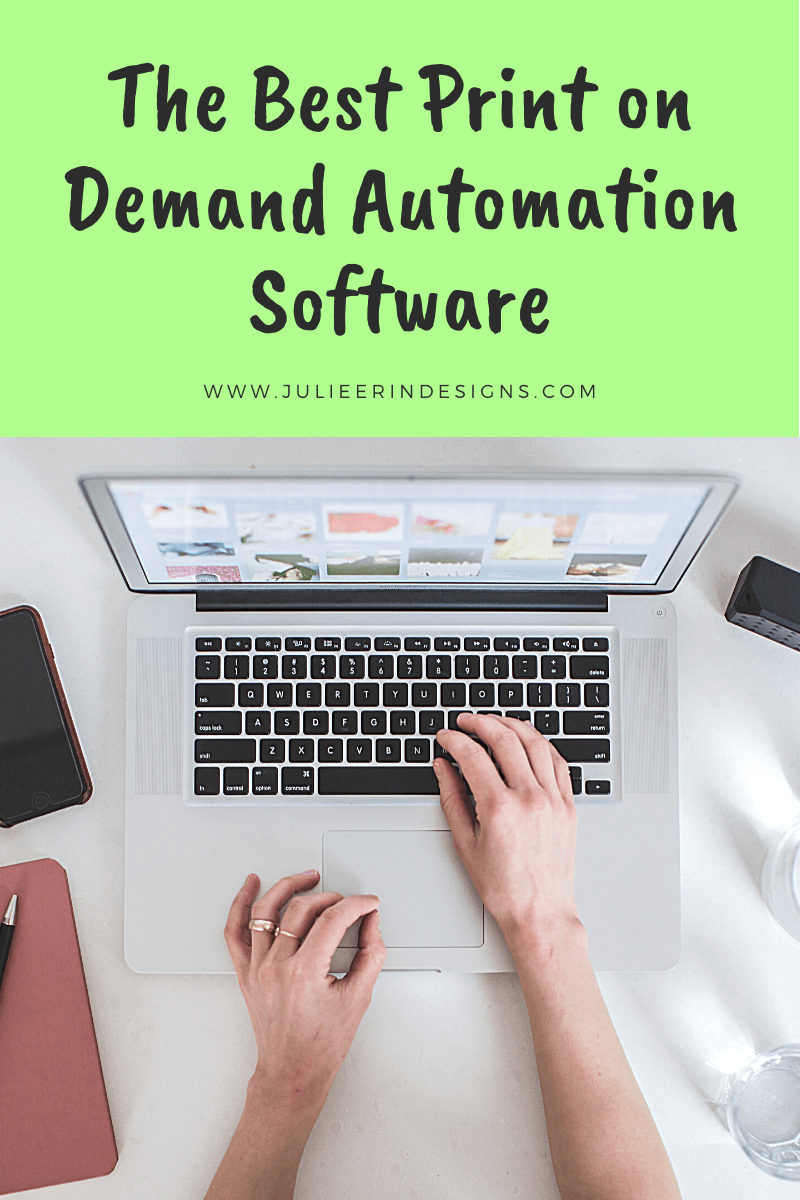
The Best Print on Demand Automation Tools

best print on demand automation tools software
the best print on demand automation software tools

Are you looking to scale your print on demand art business with automation tools and software?

As artists and entrepreneurs we are usually the sole employee of our business, and can only do so much. At some point we must turn to automation tools (or else hire someone) to take away some of the busy work, like uploading to marketplaces like Etsy, Redbubble, Society6 etc. This gives us back more time to create designs, which is what you’d rather be doing right?!

So if you’re ready to take your print on demand business to the next level, keep reading for a list of tools that might work for you!


Flying Upload

Flying Upload is a versatile automation software which integrates with Redbubble, Printful, Society6, Teepublic, Zazzle and several other marketplaces. It also includes keyword suggestions, trademark / copyright checks, and more. You can upload images and then fill in the design information right in the software. It’s fairly easy to learn and user friendly compared with some of the others in this list.

Best for: Artists who sell on many different platforms and do artistic / pattern work as well as t-shirt designers.

Cost: Free version available, Pro from $7.95 per month, (JULIE10 for 10% off)

print on demand automation with flying upload

Pod Connect

Pod Connect is another automation software which integrates with Printful and other marketplaces like Redbubble, Zazzle etc. Through Printful you can easily sell on Etsy, or even on your own website with a Shopify or Woocommerce storefront. The easiest way to upload your designs to the software is by creating a “CSV file” or spreadsheet with all of the design data. This requires a bit of work upfront but saves time in the long run.

Best for: Artists who use Printful with their own website or Etsy and do t-shirt designs.

Cost: Free trial, then $19.99 per month (JULIE20 for 20% off lifetime)

Book Bolt

Book Bolt is an all-in-one Amazon KDP (Kindle Direct Publishing) low content book creation tool, which works in the browser so you don’t have to download anything. It allows you to make lots of KDP interiors quickly and easily. There is also a built-in design tool which is pretty intuitive and you can upload your own images to pair with text and shapes. Keyword and niche research tools are also available in the tool. Upgrade to get access to PuzzleWiz which allows you to create all sorts of puzzle interiors, sudoku and more!

Learn more about selling your art on books through Amazon KDP.

Best for: Artists and designers who want to make book covers and sell “low content” books through Amazon KDP.

Cost: Some free interiors available, free trial then starts at $9.99 per month (20% off with code JULIE20).

Merch Informer

Merch Informer is an all-in-one Merch by Amazon selling platform which includes upload automation to Amazon but also other print on demand platforms like Redbubble, Teespring etc. It also includes niche research, keyword suggestion tools and a built-in design tool for those who don’t have access to design software.

Best for: Artists and designers who focus on Merch by Amazon as their main selling platform.

Cost: Free trial, starts at $9.99 per month.

print on demand automation software merch informer

Merch Titans

Like Merch Informer, Merch Titans is more geared towards folks who sell mainly on Merch by Amazon, but it can also upload to other marketplaces like Redbubble, Society6, Teepublic etc. There is also a separate tool for KDP, and tag (keyword) generators.

Best for: Artists and designers who focus on Merch by Amazon and make t-shirt designs.

Cost: Starts at $9.99 per month.

merch titans amazon

Productor Chrome Extension

Productor is a Google chrome extension which works on your Merch by Amazon dashboard. It gives you lots of analytics and also includes easy product copy and relisting functions. It’s not a 100% automated upload process since you still have to do some clicking, but it is very quick to relist designs and translate into other languages for international marketplaces.

Best for: Merch by Amazon sellers who want more analytics, translation and relisting tools.

Cost: Free!

So what are the best print on demand automation tools?

There are several different automation tools that have come available for print on demand in the last couple of years, and they’re all a little different. Your needs will vary depending on the style of art you do and the marketplaces you mainly sell on. I suggest using the free trials where available to test them out before making a decision.

Personally I’m using Flying Upload at this time. I also use the Productor Chrome Extension a lot and Book Bolt for KDP.

In the end, the best tool is the one that works for you, and is in your price range!

I hope you’ve found this post useful, feel free to leave any questions or other tools you use for your print on demand business in the comments below.

Cheers,

julie signing off

NOTE: If you’re having issues with a particular software, please contact their support, as I don’t work for them.

*Please note: Some of the tools listed include an affiliate link. When you make a purchase through the links I may earn a commission, which helps me create more content :)

Redbubble Scarf Review

redbubble scarf review scarves

I purchased a scarf from Redbubble a few years ago and realized I should review it! I really love the scarf and wear it often in the fall and winter to add a pop of colour to my outfit. Read on for my full review of Redbubble scarves.

Redbubble Scarf Review

  • The material is silky and soft to the touch.
  • The print is beautiful and slightly brighter than the mockup image on Redbubble’s website (see below).
  • It can be worn so many different ways due to it’s large size (55 x 55 inches).
  • The perfect accessory for fall or spring. It can also be worn in winter if you live in a milder climate like I do.
redbubble scarf

Redbubble Scarf Features

From Redbubble’s website they mention:

  • Full print is visible on the front and reverse
  • Microfiber polyester with a slightly transparent effect
  • Hand wash only. Do not dry clean or tumble dry.

I’ve never had to wash the scarf, so don’t let the hand wash only scare you away. Unless you dropped it in the mud it most likely won’t need to be washed very often.

scarf design redbubble

As you can see the scarf is really long! It could be worn as a sarong skirt over a bathing suit if you wanted, and also looks cute as a shoulder wrap. It would be great for traveling to places where you might have to cover your shoulders or head in certain areas. Also packs down really small which is perfect for travel.

scarf design redbubble

When folded over a few times the colour becomes darker. And there’s no white space or areas that the print doesn’t cover, which is just perfect.

Conclusion

Redbubble scarves are good quality and a great addition to your wardrobe. After a few years I have seen no evidence of wear and tear.

And they make excellent gifts since there are so many unique and beautiful designs to choose from, you can find something for anyone!

Let me know what you thought of this post, and if you think of any other products you’d like me to review, simply leave a comment below!

Other Redbubble Product Reviews

Cheers,

julie signing off

6 Tips to Increase Your Sales on Society6

selling on society 6 tips
tips increase sales on society6

Hey guys, today I’m sharing my top 6 tips to help you increase sales on the print on demand website Society6.

I’ve been selling on Society6 since 2014 and have made some decent passive income with it alongside my other Print on Demand shops.

Also read: How to Sell Your Art Online – The Definitive Guide

Watch the video below for my tips, or scroll down to read them.

6 Tips to Increase your Society6 Sales

1. Create more Designs (Increase volume)

To make more sales, you need to make more artwork. I recommend having at least 100 designs in your shop. This will take time. Try not to get discouraged or overwhelmed by this number. Find ways to speed up your design process if you can.

If you already have 100 designs, then make more of what is already selling for you. This includes re-colours of the same design, but be strategic.

Don’t just throw everything on there and hope for the best. You don’t want to waste your time uploading sub-par designs that won’t sell anyway. Quality is always better than quantity.

2. Sign up for the Society6 Blog and especially the Creative Brief

Take a look at the Society6 blog and read the advice they provide. I also like to get the Creative Brief in my e-mail. This quarterly brief includes valuable information such as trending topics, design styles, keywords people are searching for, product types to promote and upcoming holidays to hit with your promotions.

3. Use proper keywords and tags for your designs

I can’t stress this enough, to get found on Society6 you must use good titles and tags.

Use the search bar on the Society6 homepage to research keywords for your design.

They recommend using single words rather than phrases, and if you do use multiple words put a dash in between them (ex. pineapple-pattern).

society6 backpack

4. Have all your assets ready before you upload new designs

I create 3-4 different assets per design. One for t-shirts and stickers with a transparent background, one that looks good as a print, and sometimes a pattern to cover furniture and larger items. 10,000 x 10,000 pixels is what I use for the larger sized items.

The yoga mat has a special size so I usually make one specifically for that product.

I like to have all 3 or 4 images ready to go before I start uploading so it can go as quickly as possible.

5. Promote your products on Pinterest

Marketing can be difficult for artists. The simplest way I’ve found is to use Pinterest. You can pin your products straight from the product page by clicking on Pinterest sharing icon.

You can also use a mockup generating service like Place It to create fun and unique mockups of your designs to share on Pinterest and other social media.

Read more about my Pinterest marketing strategy here.

6. Experiment with different storefront layouts

You can change the layout of your Society6 shop to showcase different things like your latest designs, specific product types etc.

I recommend experimenting with the different store front layouts and give it a month or so to see if it helps with your sales, then switch it up to see if anything changes.

Bonus

Conclusion

I hope you’ve found these tips helpful and learned something new.

Make sure to follow my blog so you never miss my latest print on demand tips and tricks! I’m always sharing new strategies I learn along my journey of making an income from my art with print on demand websites like Society6.


Let me know what you thought of this post by leaving a comment below!

Cheers,

julie signing off

5 Tips to Increase Your Zazzle Sales

5 tips to increase zazzle sales

Are you an artist on Zazzle looking to increase your sales? Well then you’re in the right place because today I’m sharing 5 tips to help you improve your Zazzle store. I’ve seen an increase in sales and also my “zRank” went up by 2 points after implementing these tips.

Also read: How to Sell Your Art Online – The Definitive Guide

You can either watch the video below or scroll down to read my 5 tips to help increase your sales on Zazzle.

5 Tips to Increase your Zazzle Sales

1. Fill out your Store and Profile to 100% Completion

When you are logged in to your Zazzle store you will see a section on the right that shows your zRank and store completion. Follow the prompts there until it reaches 100% with tasks including adding media images and creating collections.

This will also help increase your zRank.

2. Set up Categories for your Products

Categories are very important because it helps keep your store organized, but also helps your customers sort through your products.

“Home Decor” is an example of a category. You can also create subcategories, such as: “Home Decor > Pillows”. I suggest creating hierarchical categories like this. Think about it like a department store, if that helps you visualize how your products could be organized.

If you haven’t done this yet in your existing store, it is possible to set the categories later. It does take some more work, so try to organize your store well from the beginning or when you add a new product type to your shop.

3. Add Categories to your Home Page

Create some custom images for the categories you’ve created, and then they will display on your store’s home page (you must enable this in the store settings).

You can switch these out to showcase different categories depending on the season, or what’s trending. Don’t go overboard with this, you don’t want to overwhelm your customer so keep it under 10 categories at a time.

Here is an example of the categories on my own home page:

4. Create Collections and add them to your Home page

Similar to categories, collections are another way to group products together. Collections sometimes show up on the product page of a product that is in that collection, so you want to take advantage of this.

Make collections of either the same design or the same product type. You could also make collections of products that go together like bathroom or bedroom sets.

Like categories, your collections can be also showcased on your home page and switched up depending on the season or trends.

5. Create Customizable Products

Quite often people come to Zazzle to find unique, customize-able products. Products like business cards, invitations, and greeting cards sell very well on there.

But, people also like other types of personalized items like shirts or cell phone cases with their (or someone else’s) name on it, to make it extra special for themselves or a gift.

So consider creating more customize-able products for Zazzle like the example below. Make sure to set the text as a template and test it out before publishing the product to make sure it works and fits both long and short names.

create custom products on zazzle

Bonus Pro Tip

Add custom mockups to your listings. This is a new feature that Zazzle has introduced which allows you to add a custom mockup or “cover photo” to make your design really stand out in the marketplace! Read more about this feature here.

You can use a mockup generating service like Place It to create fun and unique mockups of your designs to take advantage of this feature.

Conclusion

I hope some of these tips are new and helpful for you. Try implementing them next time you upload to Zazzle and see what happens! Nothing is guaranteed but it never hurts to try and always be improving your store and organization.

I’ve also got a trick to help you upload to Zazzle quicker, since I know it can be a tedious process. I demonstrate it in this video:


Make sure to follow my blog so you never miss my latest print on demand tips and tricks! I’m always sharing new strategies I learn along my journey of making an income from my art with print on demand websites like Zazzle. Keep up with my latest blog posts by joining my newsletter! 


I hope you found this post useful. Please share any other Zazzle tips you have in the comments below!

Cheers,

julie signing off

5 Tips to Increase your Redbubble Sales

increase sales on redbubble
5 tips to increase redbubble sales

Are you an artist looking to increase your sales on Rebubble? Well then you’re in the right place because today I’m sharing 5 tips I’ve recently learned to help increase your sales. I’ve seen a 3x increase in sales since implementing these tips.

Also read: How to Sell Your Art Online – The Definitive Guide

You can either watch the video below or scroll down further to read my 5 tips to help increase your sales on Redbubble.

How to Increase your Redbubble Sales

1. Create Trending Designs

You can click in the search bar on Redbubble and “trending searches” comes up. You can also type in a letter or multiple letters and trending searches come up for those too.

Create designs inspired by these trending searches and make sure to use it in the tags. Don’t create copyright designs though unless it’s part of the Fan Art program.

2. Add Your Store Name or Social Media Handle in Tags

People may search Redbubble for your name or Instagram name rather than typing in your store link. This is especially important if your name is different on social media vs. Redbubble. For example, my name is slightly different due to the character limit, so while I’m julieerindesigns in most places, my username is julieerindesign for my Redbubble store. I put both names in my tags to cover everything.

3. Add Your Store Link to the Description

This may help increase multiple sales, if someone likes your design and sees the link in the description it is easy for them to copy and paste it into the browser bar and come to your shop. I’ve seen an increase in sales of multiple products such as stickers since implementing this strategy.

increase redbubble sales

4. Make Sure Every Product Looks Nice

You want your store to look professional, so make sure every single product looks good with your design. If it doesn’t you should either modify the design, or disable that product. For example, use a clear background for stickers and t-shirts. Make sure the image covers the entire product and there is no white space surrounding it.

Having a nice, professional looking store front will increase the customer’s trust in you which increases the likelihood that they will purchase from you.

5. Share your Products to Pinterest

After you’ve submitted your design there is an option to share your products to a few social media channels. I recommend using this feature to Pin your product to Pinterest.

You can also go to the product page and share from there for additional mock up options, or use a mockup service like Place It to create fun and unique mockups to share across all social media.

Read more about How to Use Pinterest to Increase your Art Sales

Or watch my video below explaining my Pinterest strategy for Redbubble and other POD sites.

Conclusion

I hope some of these tips are new and helpful to you. Try implementing them next time you upload to Redbubble and see what happens! Nothing is guaranteed but it never hurts to try. Always be thinking about how you can optimize your products, designs, tags, etc.

I’m always sharing new strategies I learn along my journey of making an income from my art with print on demand websites like Redbubble. Check out my Resources page for more information!

And make sure to follow my blog so you never miss my latest print on demand tips and tricks.


I hope you found this post useful. Please share any other Redbubble tips you have in the comments below!

Cheers,

julie signing off

Redbubble Travel Mug Review

redbubble travel mug review

Are you considering getting a travel mug from Redbubble? Read this review of my new Redbubble travel mug first!

Since my work place is transitioning to having people back in the office a few days a week I wanted to get a travel mug that I could fill up at home to help cut down on the use of common areas.

So I thought, why not get one with my own artwork on it from my Redbubble store!

I chose my Pink and Gold Mandala Pattern design because I love pink and wanted to see how the artwork would turn out on a real life product.

redbubble travel mug review

I must say I’m impressed and pleased with how the design turned out! And I actually really like the mug itself. I’ve received several compliments on it since I started bringing it to work.

Redbubble Travel Mug Review

  • Dishwasher safe (top rack), which is great because I hate doing dishes by hand.
  • No scratching or fading after several washes.
  • Very light when empty, making it easy to throw into a purse or backpack.
  • Colour is vibrant and my artwork looks crisp and true to the original.
  • Nice mouthfeel, the little indent for the bottom lip is nicely engineered for drinking.
  • Good insulation. Keeps my coffee warm for a long time.
redbubble travel mug review

Travel mug features as per Redbubble’s website

  • Features wraparound prints
  • Top rack dishwasher safe
  • Insulated stainless steel with removable lid
  • Mug holds 15oz (443ml)
redbubble travel mug review

Overall, I am very happy with my decision to purchase this travel mug from Redbubble. I recommend to those looking for a nice mug featuring unique designs to stand out from the crowd. These mugs would make a great gift for friends, family, or coworkers who love to drink hot coffee or tea.

Shop my full line of travel mugs on Redbubble

I hope you’ve found this Redbubble travel mug review helpful in deciding whether or not to buy one.

Cheers,

julie signing off

Other product reviews you may be interested in:

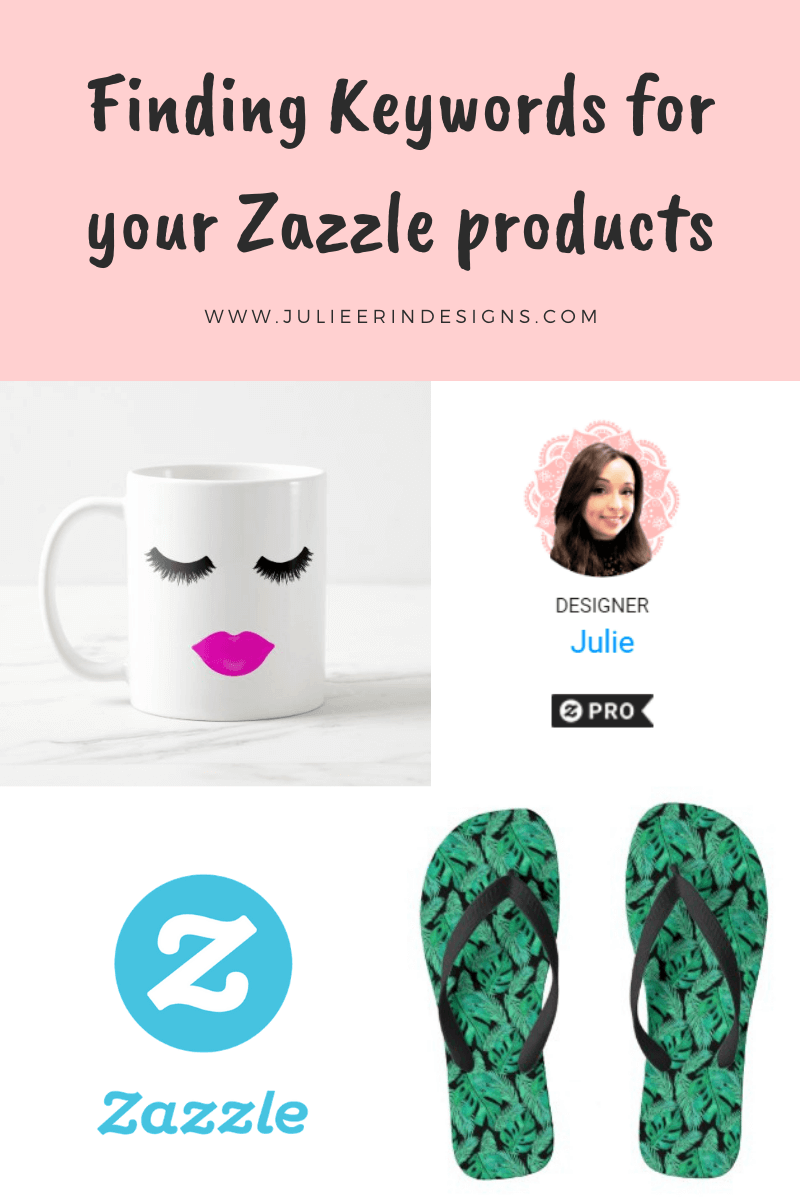
How to Find Keywords for your Zazzle Products

how to find tags for zazzle products

Hello! Today I’m sharing a quick tutorial on how to find the right keywords for your Zazzle products and improve SEO within Zazzle’s website.

I recently crossed the mark of becoming a Bronze Pro seller on Zazzle which means I’ve made over $1000 USD! Most of this happened recently as I finally figured out how to use tags and keywords properly.

To increase your sales on Zazzle you really must pay attention to SEO.

When I first started selling my art online over 6 years ago I had no idea what I was doing. After revising some of my old products and implementing this strategy I’ve seen a big increase in sales and traffic to my Zazzle shop.

Watch the video below to see a demonstration of my keywords strategy.


Of course there are other websites and tools for finding keywords and trends like Google Keyword Planner and Google Trends. The strategy I’ve shown you today is specific to the Zazzle website and their internal search engine.

How to find Keywords for your Zazzle products

  • Come up with 1 to 3 generic keywords to describe your design as a starting point.
  • Use the search function with the Zazzle website to search for that keyword or phrase. (I used “pink elephant” in my demonstration)
  • You will see some keywords and phrases come up on the top of the page. Pick a few that work for your design.
  • Click on a few top selling designs which look similar or have a similar theme to your design.
  • Scroll down on the page until you see the “Tags” section. Pick a few relevant tags from there as well.
  • Use only the tags that are highlighted in blue on either line. Black ones are being ignored by Zazzle’s search function (such as product descriptors like “blanket”).
  • Choose wisely as you only get 10 tags (or phrases) to work with.
  • Use a couple of the same keywords in your title and description as well.

I hope these tips with help you find better keywords for your Zazzle products and get you more sales!

Let me know what other tips you have for keyword research in the comments below.

Cheers,

julie signing off

You may also be interested in these posts:

Where to Sell Your Art Online in 2024

where to sell your art online 2024

This post was updated in 2024 to reflect the most current information. Some affiliate links are included.

If you’re looking for where to sell your art online in 2024, it can be overwhelming! Things have changed a lot in the last few years in the online art space. With the explosion of AI art on the scene, to major Print on Demand companies introducing paid tiers and plan structures, finding the right platform to showcase and sell your art requires careful consideration.

But it’s not all bad news… there are still plenty of places out there for you to sell your art online and even make a living from it. So, what are they? Read on to find out.

Pro Tip: Do your research before giving away any personal information or uploading your original artwork to any website or company.

Also read: Common Scams for Artists to Watch out for.

Where to Sell your Art Online in 2024

1. Zazzle 

Zazzle is where I first started my journey of selling my art online. It’s a “print on demand” (POD) platform, meaning they create the product after someone buys it. They take care of the manufacturing, shipping, and customer service for you. You earn a share of the sale (royalties), and your customer receives a unique product featuring your art.

Most of the websites in this list function similarly unless otherwise noted.

Zazzle is a great option for artists looking to sell their art online for several reasons.

  • It’s free to open multiple stores under the same account and upload unlimited designs to their marketplace.
  • There’s a helpful forum with supportive members which is a great place to share and get tips and feedback.
  • They have everything. Like literally everything you can imagine to put your art on. Even brownies! I recommend sticking to a few product types to start.
  • A huge part of Zazzle are their customize-able products. Things like invitations and business cards.

Learn how to set up your own Zazzle store step by step in my Skillshare class: Sell Your Art Online with Zazzle: A Complete Guide to Setting up Your Zazzle Store

2. Redbubble

Redbubble is still one of my most successful online art shops. They have recently introduced Artist Tiers and take a nominal fee from your earnings for hosting your shop. However, once you get past the first tier, they no longer charge you any fees.

Here are some of the benefits of Redbubble:

  • Great for beginners due to ease of use.
  • You can upload unlimited designs to sell on their marketplace.
  • Beyond art prints, Redbubble offers some unique products including scarves, dresses and mini skirts.
  • They are artist focused, and do a lot of free advertising for you.
  • Their uploading tool is easy to use and you can “copy” settings from your other designs to speed up the process.
galaxy betta fish sticker from Redbubble
Betta fish sticker from Redbubble

3. TeePublic

TeePublic focuses on t-shirts, as the name suggests, but they do carry other products including home décor and tech accessories. 

Benefits of TeePublic include:

  • The uploading process is quick and easy, making it a great choice for beginners.
  • It’s free to create a store and add unlimited designs to their marketplace.
  • Transparent .png images work best so graphic and vector styles do well here.
  • Owned by Redbubble (as of 2019).
  • They have a fan art program you can design for (also on Redbubble).
tie dye hummingbird t-shirt
Tie dye Hummingbird T-shirt on Teepublic

4. Spoonflower

If you specialize in seamless pattern design then Spoonflower is a great place to sell your art online!

  • Mainly sells fabrics and caters to the DIY community, but they also have a variety of home décor products like wallpaper and bedding.
  • Their design challenges are great for both exposure and inspiration!
  • Unlimited uploads to their marketplace.
where to sell your art online spoonflower

5. Threadless

Threadless is a great platform for more seasoned artists, as it does take a bit more time to upload your designs (if you want them enabled on all the products they offer). However, they have a unique range of products including shoes and skateboards!

Other benefits of selling your designs on Threadless include:

  • Fun design challenges.
  • Emails about promotions and marketing assets.
  • You can sell in both their marketplace and on your own customizable storefront.
  • The ability to select a cause to donate your royalties to for specific designs.
butterfly pattern shoes from Threadless
Butterfly pattern shoes on Threadless

6. CafePress

CafePress is another print on demand marketplace that has existed for quite some time (since 1999!). They have a decent range of products to customize, and other benefits include:

  • You can list unlimited designs for free in their marketplace.
  • You can create a custom store front
  • They have a fan art program so you can create design inspired by your favourite shows, celebrities and more.

7. Fine Art America

As the name suggests, this platform is focused on fine art, so canvas prints of paintings and photography do well here. 

  • You can sell both print on demand and original artworks through their platform.
  • It’s free to open a store and upload 25 designs to sell on their marketplace.
  • They have an active community with contests and other ways to participate.

8. Merch by Amazon

You can sell your designs on T-shirts and a handful of other products on Amazon! They have their own print on demand service which is linked to the Amazon marketplace.

Some things to know about selling through Merch by Amazon include:

  • You have to apply, but the earnings potential is huge.
  • Products only ship to the U.S., U.K., Spain, Italy, Germany and Japan (as of January 2024), but anyone can sell.
  • Curated product range. Various tops, phone cases, pillows, tote bags, and Popsockets at the time of this writing.

Read more about my first year experience selling on Merch by Amazon.

purple daisy pattern popsocket magsafe
Magsafe Popsocket on Merch by Amazon

9. Etsy

Etsy is a well known marketplace for hand-made goods like original art, jewelry and pottery, but also digital products and more. It’s not a print on demand store, like many of the others listed here, but a platform to sell your existing products through.

  • The right place for you if you make hand-made clothing, accessories, jewelry, candles, or want to sell original artworks or even digital products.
  • There is a small fee to upload, 20 cents per listing, but you can get 40 free Etsy listings using this link.
  • You can integrate Etsy with a print on demand service like Printful (more on this below) to sell these types of products on their marketplace.

10. Society6

Society6 is another well known print on demand website with a heavy artist focus and community.

They have recently introduced fees like shipping fees and paid Artist Plans (if you want to upload more than 10 designs to your shop). We will see what the future holds for Society6, but I’m keeping on the list for now because it has been good to me in the past, and may still be.

Benefits include:

  • A similar range of products as Redbubble with a few extras like yoga mats and furniture.
  • A helpful blog with tips for artists and sales templates e-mailed ahead of time.
yoga mat on society6 where to sell you art online
Yoga mats on Society6

11. On your own website

If you already have a pretty solid fan base then selling art through your own website could be the way to go.

You can use a print on demand service like Printful to sell print on demand products through your own shop on your website. You can also create listings for original paintings, digital downloads or other goods using a shop builder like Woocommerce or Shopify.

Benefits include:

  • Full control over your brand, the look and feel of your store and check out process.
  • Ability to schedule promotions and create promo codes.
  • Set your own prices and shipping costs.
  • Ability to sell a variety of product types in once place like original artworks, print on demand products and digital products.

Downsides include:

  • Costs some money to set up: Domain name, hosting, possibly a premium theme or platform to use for your shop (Woocommerce is free).
  • More initial work to set up your shop and a steep learning curve if you don’t have any website building experience.
  • You will have to market the store yourself which is why I recommend it for those who have a strong brand and fan base already established.

Bonus Tip: Use PodConnect to upload to multiple stores at once.

I recently learned about a software called PodConnect which allows you to upload your art to multiple print on demand websites at once! There is a free trial, and if you decide to buy a subscription use my promo code julie20 for 20% off!

podconnect print on demand multi uploader

Well that’s it guys, thank you so much for taking the time to read all this information I’ve compiled for you.  I hope you find the right place to sell your art online and I wish you the best of luck with your business!

If you have any questions or comments feel free to leave them below.

Cheers,

julie signing off

Society6 Yoga Mat Review

society6 yoga mat review

I’ve been getting back into yoga lately with the whole lockdown thing going on, almost practicing every day! I know a lot of other people are too and might be looking into getting a new yoga mat. Especially from Society6 since they have so many cute and unique designs created by artists like myself.

So I bought a yoga mat from Society6 with one of my mandala designs on it and thought I’d share a review of it today for those on the fence about getting one.

society6 yoga mat full length

What I love about my yoga mat from Society6:

  • The artwork is vivid, crisp, and makes me happy to look at (especially since it’s my own art).
  • It has a nice, grippy texture (see close-up below).
  • It’s not too thick but squishy enough to be comfortable while lying down on the ground.
  • It comes with a carrying strap for easy transportation to and from the yoga studio.
  • Very affordable for the quality.
  • The perfect length for yoga practice (70″ long by 24″ wide, 1/2″ thick).
society6 yoga mat close up

Quick note: When I first unrolled the yoga mat it had a strong chemical smell.

I assume a combination of the yoga mat material with the printing process made it smell that way.

To remedy this, my yoga teacher recommended rubbing essential oil on it. After doing that and airing it out overnight the smell did go away. Apparently this is common with a lot of yoga mats.

Beyond this initial unpleasant experience, everything else about the mat has impressed me and I absolutely love using it. Back when I was still going to in person classes, I always received compliments on the mat and people asking me where I got it from.

society6 yoga mat

So if you are on the fence about getting a yoga mat from Society6, I say go for it!

Check out my full line of yoga mats here.

And to go along with your new yoga mat, here’s one of my favourite yoga workout videos from Youtube!

Interested in more reviews of Print on Demand products?

See these posts:


Cheers,

julie signing off