How to Find Your Own Unique Art Style

how to find your art style

As an artist, discovering your own unique art style is like finding your voice in the world. Whether you’re selling your art online, through retailers, or at a craft fair, having a distinct look sets you apart from the crowd. But how do you find your own unique art style when there are so many options to choose from?

how to find your own unique art style

Try New Things

Start by experimenting! Digital and traditional tools let you try out all sorts of techniques and ideas. Especially when you are first starting out, don’t be afraid to play around with a wide variety of mediums to discover what you enjoy working with. Mistakes are part of the process, and sometimes they lead to unexpected discoveries. Every stroke of your brush or pen helps shape your style.

How to Find Your Own Unique Art Style

Pro Tip: Have a sketchbook that is designated just for you to practice, create ugly art, experiment, and test new ideas without the pressure of having to finish it or share it with anyone else. I also recommend this book: Wreck This Journal.

Take a Class or Follow a Tutorial

Taking online art classes and following tutorials have been a huge help for me in defining out my own art style. YouTube and Skillshare have loads of classes on different software, techniques, and styles. Implementing what you learn and putting your own twist on it can really help you find your unique look. In person classes can be really inspiring too! So, don’t be afraid to sign up for a class or watch a tutorial— it could make all the difference in your creative journey.

Get Inspired by Other Artists – Past and Present

Take inspiration from artists you admire. Look at their work closely—how do they use color, shape, and theme? But it’s not just about the famous artists; check out what’s happening in the art world right now. You’ll pick up tips and trends that can influence your own style. Be mindful not to copy others though!

Pro Tip: Visit art galleries and outdoor art events regularly in your city to get inspiration from a mix of classic and contemporary artists.

photo of a woman at an art gallery

Trust Your Gut

Listen to your instincts. What subjects excite you? Which colors make you feel something? What types of marks or mediums do you enjoy working with the most? Your style should reflect who you are, so trust your inner voice when making artistic choices.

Keep Improving

Refine your work over time. Look back at what you’ve created and think about how you can make it even better. Listen to feedback from others, but remember to stay true to yourself. Improvement is about polishing your style, not changing who you are.

Pro Tip: Make a lot of art. It can take years to develop a cohesive art style, and having a large body of work to look back at makes it easier to identify consistencies which will help you define your style.

Pictured below: One of my old mandala illustrations vs. a newer piece. Note the improvement!

black and white mandala art drawing
pink flower mandala

Be Flexible

While it’s important to have a consistent style, don’t be afraid to try new things. Your style can grow and change over time as you do. Adapt to new trends while staying true to what makes your art unique. This could look like incorporating a trending colour, like the Pantone Color of the Year, or a trending theme into your work – but making it your own. This could also be trying out a new software or medium to create your work.

Learn More

To learn more about how to find your own unique art style I highly recommend this Skillshare class: Find Your Style: Five Exercises to Unlock Your Creative Identity.

man and woman having a conversation about art styles

Create Your Legacy

Remember that your style is your brand. Make sure your work reflects who you are as an artist, but also as a unique person. Pour your heart into every design you create. Whether it’s original artwork, digital illustration, pattern designs for clothing, home goods, or paper products, let your art speak for itself and connect with people around the world.

Finding your art style isn’t a one-time thing—it’s a journey. Embrace the process, and trust that your unique voice will shine through in your work. So, grab your favourite tools and start finding your art style today!


Cheers,

julie signing off

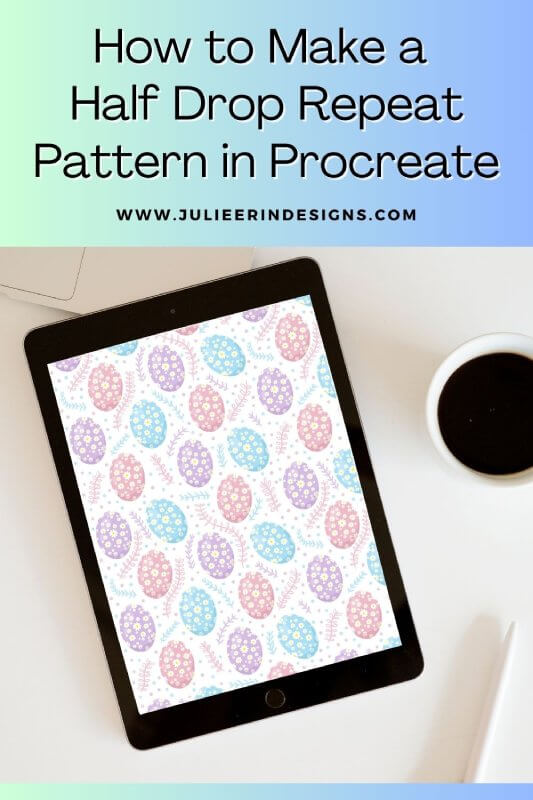
How to Make a Half Drop Repeat Pattern in Procreate

half drop repeat pattern procreate

Are you an aspiring digital artist or designer looking to master the art of creating seamless and visually appealing patterns on your iPad? In this step-by-step guide, we’ll explore how to design a half drop repeat pattern using the Procreate app, turning your ideas into beautifully tiled masterpieces.

You can watch my video below, or keep scrolling for a written guide.

How to Make a Half Drop Repeat Pattern in Procreate

Step 1: Set Up Your Canvas

Open Procreate on your iPad and create a new canvas. For pattern design, it’s crucial to choose a square canvas to ensure symmetry. A standard size like 3000×3000 pixels works well, but you can adjust according to your preference and needs.

Step 2: Draw your Motifs

Use the Procreate brushes to sketch your motifs on the canvas. Whether it’s florals, geometrics, or abstract shapes, this is the stage to let your imagination run wild. Make sure your motifs are drawn or merged onto a single layer with a transparent background. Once you’re satisfied with the design, duplicate this layer and lock it so you preserve the original artwork.

how to make a half drop repeat pattern procreate

Step 3: Add Color to all 4 Corners of the Canvas

After finalizing your design, choose any color and apply it to each of the four corners of your duplicate layer, without overlapping your motifs. Ensure that you’re working on the same layer as your design. This will be erased later, but will enable us to use Snapping to create our half drop repeat pattern.

procreate repeat pattern tutorial

Step 4: Duplicate and Turn Snapping and Magnetics on

Duplicate this layer 4 times, so you should now have 5 copies in total. To do this, select the layer and swipe to the left, then select “Duplicate.”

Next, go to the move tool (arrow) and into the Snapping settings. Turn Magnetics and Snapping on and have the Distance and Velocity turned up all the way as high as they can go.

repeating pattern tutorial procreate

Step 4: Shrink and Snap the Layers into Place

Now, turn off all other layers except for the one you’re working on. Using the move tool to shrink it down from the corner until it snaps into place into the bottom left corner of the canvas, exactly 1/4 of the canvas.

Turn on the next layer, and snap it to the top left corner of the canvas, right above the first layer. Do the same with the next layer, shrinking it down to the bottom right corner of the canvas.

Now we will create our half drop by dragging this layer to the center of the right side of the canvas. You should see yellow lines in the center of your canvas which indicates you’ve snapped it to the right place.

half drop repeat pattern procreate

Step 5: Finish off Your Half Drop Pattern

Shrink your next layer down into the bottom right corner and drag it down until it’s half way off the canvas and snaps to the bottom of your centered layer. The bottom half will get cut off, and that’s fine, it’s what we want.

Do the same thing with your final layer, but snap it to the top right of the canvas, then drag it up above that middle layer. The top half will get cut off, which again is what we want. Then, pinch all of the layers together. Finally, go in and erase those triangle markers, as they were simply to facilitate Snapping, and not part of our design.

finishing the half drop repeat

Step 6: Finalize the design

From here, you can go in and refine your pattern by adding some elements in between your motifs, or even moving your original motifs around a little bit. Just be careful not to go over any of the edges or move any of your motifs that spill over the edges.

Step 7: Test Your Repeat Pattern

Before finishing our design, it’s essential to make sure the repeat pattern is working correctly. To do this, first create a copy of your pattern tile. Then, add a new layer below this and fill it with a solid color, ideally one that you want to use as your pattern’s background. Pinch the 2 layers together into a single layer.

repeating patterns in procreate

Duplicate this layer 3 times, so you have 4 copies in total. Using the move tool, with Snapping and Magnetics on, shrink each layer down and snap them to each of the 4 corners of the canvas. Make sure to snap them to the yellow lines, to ensure they line up correctly.

testing the repeat pattern procreate

Step 8: Finishing Touches

From here, you can zoom in and check the attachment points to ensure that your repeat is working correctly. You can go back to the original pattern tile and make adjustments If necessary, but you now have the basis for your half drop repeat pattern!


Creating a half drop repeat pattern in Procreate is a rewarding journey that allows you to unleash your artistic vision and apply your designs to an even wider array of products through Print on Demand websites. Remember, practice makes perfect, so don’t hesitate to experiment with different techniques and styles. With Procreate’s intuitive interface and powerful features, you’ll be crafting stunning patterns in no time. Happy creating!

Cheers,

julie signing off

The Best Photoshop Alternatives for Digital Artists

The Best Photoshop Alternatives for Digital Artists

In the realm of digital art, Adobe Photoshop has long reigned supreme as the go-to software for artists. However, as the digital art community continues to grow, so does the demand for alternative tools that offer powerful features, affordability, and versatility. Whether you’re a seasoned pro or just starting your digital art journey, there’s a wide array of Photoshop alternatives to consider.

The Best Photoshop Alternatives for Digital Artists

In this blog post, we’ll explore some of the best Photoshop alternatives, catering to various needs and budgets, in no particular order.

Please note: prices listed below are in USD and reflect the price at the time of writing this article in October 2023. Some links may contain affiliate links.

woman holding silver ipad using procreate

Procreate

Price: $12.99

Targeted at iPad users, Procreate is a robust and intuitive drawing and painting app. With a sleek interface, Procreate offers an impressive set of brushes, blending modes, and a straightforward layer system. It’s a fantastic choice for artists who prefer to work on a tablet.

Corel Painter

Price: $429 one-off or $199 per year subscription

Corel Painter is renowned for its emulation of traditional media. It offers a vast array of brushes and tools, making it a top choice for artists who want to recreate the look and feel of traditional painting on a digital canvas. It’s excellent for those seeking a more painterly experience.

Photopea

Price: Free!

Photopea is a free online image editor that closely resembles Adobe Photoshop in both look and functionality. It’s perfect for artists who need Photoshop-like features without the Adobe subscription cost.

Affinity Photo

Price: $69.99 for desktop or $18.49 for the iPad version

Affinity Photo is a powerful Photoshop alternative that’s available for a one-time purchase, making it an attractive option for budget-conscious artists. It offers a wide range of tools, including retouching, selection, and compositing capabilities, along with advanced color correction and RAW editing.

artist's laptop

Clip Studio Paint

Price: $49.99 one-off or $0.99 per month subscription

Clip Studio Paint is renowned for its specialized tools for comics and manga artists, but it’s also a versatile choice for digital painters. It provides an extensive brush library and a vector layer feature, which is useful for line art and inking. It comes in both Pro and EX versions, catering to different needs and budgets.

Krita

Price: Free!

Krita is an open-source digital painting application that’s gaining traction among artists. It offers a user-friendly interface, a broad selection of brushes, and advanced features like HDR painting. Being open source, Krita is free to use, making it a popular choice for artists on a tight budget.

GIMP

Price: Free!

GIMP is a free and open-source raster graphics editor that provides a robust set of tools. While its user interface might feel a bit different from Photoshop, it’s highly customizable and capable of handling complex photo manipulation and digital painting tasks.

ArtRage

Price: $79.99

ArtRage is designed to simulate traditional art materials like oil paint, watercolor, and pencil. It’s an excellent choice for artists who want to experiment with realistic textures in their digital work. It’s available for Windows and macOS, as well as iOS and Android devices.

digital artist looking for photoshop alternatives

PaintTool SAI

Price: $36.69 (or 5500 Japanese Yen)

PaintTool SAI is a lightweight and affordable option. It’s especially popular among manga artists due to its simplicity and high-quality brush engine. Although it may lack some of the advanced features of other software, it excels in its primary function: drawing and painting.

Medibang Paint

Price: Free! (includes in-app purchases)

Medibang Paint is a free, cloud-based digital art app suitable for both beginners and professionals. It comes with various brushes, pre-made backgrounds, and cloud syncing for seamless collaboration. Medibang Paint is available for Windows, macOS, iOS, and Android.

Rebelle

Price: $89.99 or $149.99 for Pro

Rebelle stands out for its focus on replicating traditional watercolor and acrylic painting techniques. It simulates watercolor diffusion, color bleeding, and other realistic effects. It’s a unique choice for artists who want to explore a more organic painting experience.

Inkscape

Price: Free!

Inkscape is a vector graphics editor suitable for artists who work on digital illustrations, logos, or vector-based artwork. It offers a comprehensive set of tools for creating scalable graphics and is free to use.

photoshop alternatives for digital artists

Autodesk SketchBook

Price: Free! (or $19.99 for Pro)

Autodesk SketchBook is a versatile drawing app available for various platforms. It’s popular among artists due to its responsive brushes and robust drawing capabilities. While the basic version is free, Autodesk also offers a subscription plan with additional features.

MyPaint

Price: Free!

MyPaint is another open-source digital painting software that focuses on simplicity and an unobtrusive user interface. It’s well-suited for artists who want an uncluttered canvas to focus on their creative process.

As you can see from the choices above, the world of digital art apps is vast, with options for every artist’s preference and budget. From Procreate’s intuitive iPad experience to the affordable power of Affinity Photo, these Photoshop alternatives can help you create stunning digital art and enhance your artistic journey. So, don’t be afraid to explore the many Photoshop alternatives and discover the one that best suits your creative needs.

If you want to learn more about the art apps and tools I use for my own creative art business, check out the Artist’s Resources section here on my website.

Cheers,

julie signing off

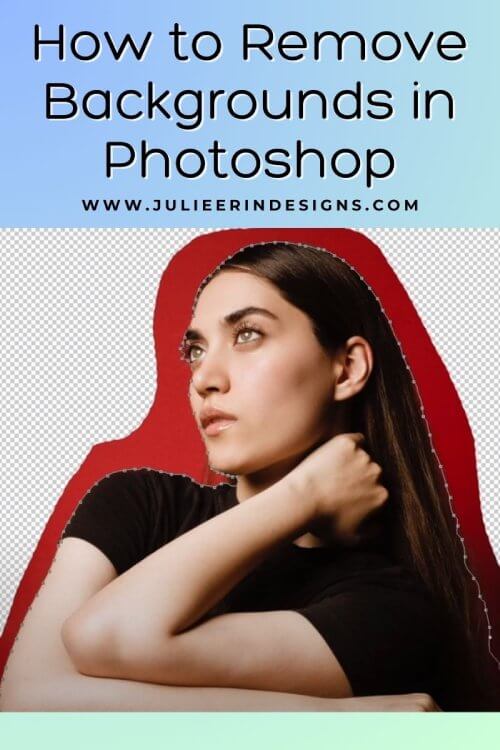
How to Remove Backgrounds in Photoshop

how to remove backgrounds in photoshop

Are you looking to take your image editing skills to the next level? Then look no further than this tutorial on how to remove backgrounds in Photoshop!

how to remove backgrounds in photoshop

In this video tutorial I take you step by step through the process of removing backgrounds from images using the selection and lasso tools.

I demonstrate how to do this with a both a simple image of a laptop, and a more complex image featuring a person in the foreground.

You can use these skills to edit your photographs, or create designs with transparent backgrounds to use for stickers, t-shirts and other print on demand products with Photoshop!

How to Remove Backgrounds in Photoshop with Lasso Tools

  1. Open your image in Photoshop and double-click the background layer to unlock it.
  2. Use the Eraser tool to erase out major parts of the background, without getting too close to your subject.
  3. Select the appropriate lasso tool for your image, such as the Lasso Tool, Polygonal Lasso Tool, or Magnetic Lasso Tool.
  4. Begin by making a rough selection around the object or subject you want to keep. For straight edges, use the Polygonal Lasso Tool. For irregular shapes, use the Lasso Tool or Magnetic Lasso Tool.
  5. Continue tracing the outline of the object, and close the selection by connecting the endpoint with the starting point.
  6. If needed, use the Add to Selection or Subtract from Selection options to refine the selection (Can also use + or ).
  7. Hide or delete the original background layer (if there is one remaining) to see the transparency.
  8. Use the Eraser Tool or Layer Mask to further refine the edges of the object if necessary.
  9. Create a new layer below, and fill it with a solid color to check for any stray pixels.
  10. Save your image in a format that supports transparency, like .PNG.

With practice and experimentation, you’ll become more proficient in using lasso and selection tools to remove backgrounds in Photoshop.

In conclusion, removing backgrounds in Photoshop using the lasso tools is a powerful technique that allows you to isolate objects and create images and graphics with transparent backgrounds. With the flexibility and precision of the lasso tools, you can achieve clean and professional results.

Remember to practice and experiment with different selection tools to find the one that works best for your specific image. So go ahead and give it a try in your next project!


Cheers,

julie signing off

How to Make Coloring Pages on Your iPad with Procreate

Hey there, fellow creatives! I’m excited to share with you a fun tutorial on how to make your very own coloring pages on your iPad using the Procreate app.

coloring pages ipad procreate tutorial

In this step-by-step tutorial, we’ll dive into the world of creating beautiful mandala coloring pages on your iPad, complete with inspiring quotes that will uplift your spirits. So, grab your iPad and let’s get started!

How to Make Coloring Pages on your iPad with Procreate

Step 1: Setting up your Canvas

To start, open the Procreate app on your iPad and create a new canvas. Choose the dimensions and resolution that you prefer for your coloring page.

To create coloring pages for print, I suggest using the Paper size, which is 8.5 x 11 inches.

coloring pages ipad page setup

Step 2: Drawing the Mandala

Navigate to the Actions menu (the wrench icon on the top left of the screen), click on Canvas, turn Drawing Guide on and then click Edit Drawing Guide.

Then go down to Symmetry > Options, and select the Radial option.

Now, using the drawing tools in Procreate, begin drawing your mandala. Play around with different shapes, patterns, and intricate details to make your mandala unique.

drawing a mandala in procreate

Step 3: Adding Inspirational Quotes

Now, it’s time to incorporate an inspirational quote (or other text) into your coloring page. Select a quote that resonates with you or your audience.

To add your text, go to the Actions menu again, click on Add, and then click on Add Text. Type out your quote, then go to Layers, tap on the text layer, and then select Edit text. Under Attributes, select the icon that looks like an O (next to Underline). This will make the text appear as just the outline of the font (note: this does not work on all fonts).

Then, you can go through your fonts and select one you like. You can download additional fonts from Creative Fabrica, if you like.

If the letters of your chosen font are connecting, they may overlap. You can then go to Layers, tap on the text layer and select Rasterize. Then you can go in and erase the overlapping lines to make the text connect cleanly.

Finally, position the text around the mandala, ensuring it complements the overall design.

ipad coloring page tutorial

Step 4: Final Touches and Exporting

Once you’re satisfied with your coloring page, take some time to add any final touches or details.

When you’re done, export the file in a high-resolution format, such as a PDF, PNG or JPEG, depending on your specific needs.

To share your mandala go up the Actions menu (wrench icon), click on Share, and then select the file type you require, and save it to your iPad.

Now you’re ready to print or share your new coloring page however you like!

coloring pages ipad procreate export

Conclusion

Congratulations! You’ve successfully created a stunning inspirational quote mandala coloring page using Procreate on your iPad.

Coloring pages are not only a great way to relax and unwind but also make wonderful gifts or digital products to share with others. You could even make and sell your own coloring book if you make enough of these.

You can also download the coloring pages featured in this tutorial by clicking on the image below or visiting the Downloads section of this website. There, you’ll find a collection of intricate mandalas and uplifting quote designs ready to be colored and enjoyed.

Whether you choose to unwind with a cup of tea or share the joy of coloring with friends and family, these printable coloring pages are sure to bring moments of tranquillity and creativity into your life.

coloring pages ipad procreate tutorial

I hope this tutorial has inspired you to create your own coloring pages! Feel free to experiment with different styles, themes, and techniques to create unique coloring pages that reflect your artistic vision. The possibilities are endless!

If you enjoyed this tutorial, don’t forget to like and subscribe to my YouTube channel for more art-related content. Stay tuned for future videos where I’ll be sharing additional tips, tutorials, and creative inspiration.

Thank you for joining me, and I can’t wait to see your beautiful creations!


Cheers,

julie signing off

Sell Your Art Online with Zazzle: A Complete Guide to Setting up Your Zazzle Store

Are you a creative person looking for ways to monetize your art, or an entrepreneur interested in building an online print on demand business? I’m excited to share my latest Skillshare class with you: Sell Your Art Online with Zazzle: A Complete Guide to Setting up Your Zazzle Store.

Sell Your Art Online with Zazzle: A Complete Guide to Setting up Your Zazzle Store

But first, what exactly is Zazzle? In short, Zazzle is a print on demand marketplace where you can create designs for real life products, like art prints, t-shirts, mugs, phone cases, and more. Then, those products are printed and shipped to customers after they order them. This eliminates the need for inventory and allows you to focus on creating and marketing your designs!

Zazzle is just one of many print on demand marketplaces that you can use to sell products from your art.

I really like Zazzle because they offer a wide range of products, from apparel to home décor to electronics, so you can create a diverse product line that appeals to your audience.

With thousands of shoppers from around the world browsing the site every day, Zazzle has a huge customer base. And their platform is user-friendly and easy to navigate, so you can focus on designing and marketing your products without getting bogged down by technical details.

gold foil art print collection on Zazzle

In my Skillshare class, Sell Your Art Online with Zazzle, I’ll guide you through the entire process of setting up your own Zazzle store, from designing your products to customizing your storefront and much more.

Before diving in, check out the class trailer below to get an idea of what you’ll learn and see if it’s right for you. And if you have any questions, don’t hesitate to reach out to me or post a comment below. I’m here to support you and help you succeed!

Here’s a peek at what we’ll cover in the class:

  • Setting up your store
  • Navigating the Zazzle website
  • Creating multiple product types from simple to advanced
  • Raising your ZRank
  • Organizing your store using Categories and Collections
  • Tips and tricks to streamline product creation
  • Creating custom banners and cover images for Collections and Categories
  • Customizing your store front
  • Additional pro tips from a Pro Bronze seller with nearly 10 years of experience

You can watch my Skillshare class for free with a one-month trial membership using my link.

This means you’ll have access to not only my class, but also thousands of other classes on Skillshare, including classes on graphic design, branding, and social media marketing.

Whether you’re a beginner or an experienced Zazzle seller, there’s something for you in this class. I can’t wait to see what you create!

Cheers,

julie signing off

How to Write an Art Business Plan

how to write an art business plan

Running a successful art business requires more than just creativity and talent. It also requires a solid plan that outlines your goals, strategies, and resources. An art business plan can help you stay focused, organized, and motivated as you navigate the ups and downs of running a business. Whether you’re a seasoned artist looking to take your business to the next level, or a beginner just starting out, this guide will help you create a roadmap for success.

how to write an art business plan

As an artist who has turned my passion into a successful business, I understand the importance of having a well-crafted business plan. Over the years, I have honed my skills and learned what it takes to make an income as an artist, and I want to share my knowledge with you. By following the steps outlined in this post, I believe that you too can create a solid art business plan that will help you achieve your goals and build a sustainable career.

Why You Need an Art Business Plan

An art business plan is a roadmap for artists to achieve their professional goals. Whether you’re just starting out or have been selling your art for a while, having a solid business plan is crucial for success. Think of it as a roadmap that will guide you towards achieving your goals and making your art business dreams a reality. Don’t worry if you’ve never written a business plan before, it doesn’t have to be super complicated or intimidating. You can make it as detailed or as simple as you like, just start somewhere!

As we go through this post, make sure to take notes on all the sections we cover. You can keep your art business plan in a notebook, a Google doc, or a Word document. I also have a Notion template that you can use as a starting point.

photo of planner and writing materials

What to Include in Your Art Business Plan

When it comes to creating your art business plan, there’s no one-size-fits-all. Your plan should be customized to fit your unique goals, vision, and circumstances. However, there are certain elements that most art business plans have in common. Here are some key sections to include:

  1. Business Summary: This section should include a brief overview of your business, your mission statement, and your unique selling proposition.
  2. Market Analysis: Here you will conduct research to gain an understanding of your target audience, your competitors, and the overall market.
  3. Products and Services: Describe the products or services you offer, and what makes them unique.
  4. Marketing Strategy: Outline how you plan to market and promote your art business to reach your target audience.
  5. Financial Plan: This section will outline your projected income and expenses, as well as your funding sources and financial goals.

Remember, your art business plan can be as detailed or as simple as you like, depending on where you are on your art business journey. The most important thing is to just start somewhere, and make adjustments along the way as your business grows and evolves.

Now that you have a basic understanding of what should be included in your art business plan, let’s dive deeper into each of these points and discuss how you can create a plan that will help you achieve your business goals.

black and white laptop

A Summary of Your Art Business

The Business Summary section is where you’ll give a quick and easy rundown of your business. It’s important to include your mission statement, which is essentially what your business is all about, as well as your unique selling proposition, which is what sets you apart from your competitors. Think of this section as an elevator pitch – it should be short, sweet, and to the point!

  1. Identify your business’s purpose and goals: Ask yourself what your business is about and what you want to achieve with it. Write down your answers and summarize them into a few sentences.
  2. Define your target audience: Think about who your ideal customer is and what they’re looking for. This will help you create a more targeted and effective summary.
  3. Focus on your unique selling proposition: What sets your business apart from others in your industry? Highlight your unique strengths and what makes you different.
  4. Use simple language: Your summary should be easy to understand and concise. Avoid using technical jargon or complex language.
  5. Get feedback: Share your summary with others and get feedback. This can help you refine your message and ensure it resonates with your audience.
concentrated couple working on their art business plan

Conduct a Market Analysis

The market analysis section is all about doing your research to gain a deep understanding of your target audience, competitors, and the overall market. It’s important to know who your customers are, what they want, and how you can differentiate yourself from your competition.

This section can include data on your target market’s demographics, interests, and purchasing behaviors. You’ll also want to research your competitors and identify their strengths and weaknesses. By analyzing the market, you can better position yourself to succeed.

How to conduct a market analysis?

Here are some actionable tips for conducting market research as an artist:

  1. Identify your target audience: Think about who your art is meant for, what their interests are, and where they spend their time. Look at demographic data, such as age, gender, location, and income, to get a better understanding of your target audience.
  2. Research your competition: Look at other artists in your niche and see what they are doing. What are their strengths and weaknesses? What makes your art unique compared to theirs? You can also look at their pricing, marketing strategies, and social media presence to get an idea of what works well.
  3. Understand the overall market: Look at trends in the art market to see what types of art are popular right now. Consider the economic climate and how it may affect the art market. Look at art publications and websites to see what topics are being covered and what people are interested in.
digital artist supplies

Describe your Products and Services

In this section, you’ll want to provide a detailed description of the products and services you offer as an artist. Be sure to include information about the materials you use, the types of art you create, and any special techniques or processes that set your work apart. You can also talk about any additional services you provide, such as commissions or custom pieces. Don’t be afraid to get specific and really showcase what makes your art unique and desirable to your target audience.

Some examples of what you could include in this section are your original paintings, prints, commissions, workshops, or even merchandise like stickers or tote bags featuring your art. It’s important to be specific about what you offer, so your potential customers can understand what they’re buying and what sets your work apart from others.

Develop a Marketing Strategy

Now that you have a good understanding of your audience and products/services, it’s time to develop a marketing strategy that will help you promote your business. Some effective strategies for artists include social media marketing, email marketing, collaborations with other artists or businesses, and participating in local events and markets.

Choose the strategies that best fit your business and audience, and be sure to set goals and track your progress. For example, you could aim to grow your social media following by 100 followers each month, or to send out a monthly newsletter to your email subscribers. By developing a clear marketing strategy and tracking your progress, you can ensure that you’re reaching your target audience and achieving your business goals.

close up photo of survey spreadsheet

Come up with a Financial Plan for your Art Business

Managing the financial aspect of your art business may seem intimidating, but it’s a crucial step in achieving your goals. First, identify your start-up and ongoing expenses, as well as potential income streams, to determine your break-even point and set reachable financial goals.

You can use online accounting tools or create a budget spreadsheet to monitor your expenses and income regularly. It’s essential to have a clear understanding of your finances, so you can make informed decisions about pricing, marketing, and investments. In my Art Business Toolkit Notion template, I’ve included a budget tracker to help you get started. By tracking your expenses, you’ll be able to make strategic decisions that contribute to the growth and profitability of your business.

Conclusion

In conclusion, writing an art business plan may seem overwhelming, but it is a critical step in achieving your goals as an artist. By breaking down the process into manageable sections, you can create a plan that reflects your unique vision and sets you up for success. Remember to use the tips and tools provided in this post, and don’t be afraid to start small and revise as you go. Once you’ve completed all of the sections, put it all together into a cohesive plan that will guide you as you build and grow your art business. With dedication, persistence, and a solid plan, you can turn your passion into a thriving business.

Cheers

julie signing off

How to Use AI Tools to Boost Your Art Business

ai tools for art business

In this blog post, we’ll explore various ways to leverage AI tools to enhance your art business. However, we will not be discussing the topic of creating and selling AI art, which is a separate subject altogether. If you’re curious about using AI to boost your art business, spark your creativity, and increase your productivity, then keep reading!

ai tools for art business

AI has been a hot topic in the art world lately, and for good reason. But it’s not going away anytime soon, so why not embrace it? By using AI as an assistant for your art business, you can supercharge your productivity and take your business to the next level. With a bit of creativity, there are numerous ways you can use AI to your advantage.

What is AI?

Artificial Intelligence, or AI for short, is a branch of computer science that focuses on the development of intelligent machines that can perform tasks which traditionally required human intelligence, such as answering questions, conducting research, and problem-solving.

Recently, AI has become increasingly prevalent in various fields, including the arts, and has opened up new opportunities for creative business owners. Through machine learning and other AI-powered tools, artists can now generate personalized content, analyse data, and conduct market research with greater ease and efficiency. AI can be used in a number of different ways in your art business, from automating simple tasks to helping you out of a creative rut.

a woman using ai for her art business

How can you use AI in your art business?

There are many ways to use AI to boost your art business. Here are some examples:

Writing a business plan

Creating a business plan is essential to the success of any business, including an art business. By using AI you can create a comprehensive business plan that outlines your goals, objectives, and strategies for success. Feed the AI as much data as you can about your business and ask it to create a business plan for you. You can then tweak and revise it as needed and go from there.

Conducting market research

To grow your art business, you need to understand your target market. AI can help you conduct market research to identify your target audience and their preferences. With AI-powered tools, you can analyse data on your customers’ demographics, interests, and behaviours to gain insights into what they may want. By understanding your target market, you can tailor your artwork and marketing messages to better meet their needs and preferences.

Generating ideas for new artwork

One of the biggest challenges for artists is coming up with new and innovative ideas for artwork. AI can help generate new ideas for artwork that will appeal to your target market. These tools use algorithms to analyse data on your target audience’s preferences and suggest customized artwork that is tailored to their interests. By using AI to generate ideas for new artwork, you can save time while creating pieces that resonate with your audience.

Writing marketing copy

Marketing is crucial for any art business. However, writing effective marketing copy can be challenging. With AI tools, you can create compelling social media posts, blogs, and product descriptions that resonate with your target audience.

When it comes to using AI for your art business, the output is only as good as the input. To learn more about how to use AI properly, and structure your prompts to get the best results possible, I highly recommend this Skillshare class: Chat GPT for Creatives by Peggy Dean

using ai to improve your art business

Using AI to improve your own artwork

One of the great things about AI-powered tools like CF Spark is that it can be used to generate new and unique artwork. Consider this: instead of looking at other artist’s work for inspiration, use AI instead! These tools are also great for getting out of a creative rut and help you find inspiration even when you’re feeling stuck. So, don’t be afraid to use AI to explore new ideas and push the boundaries of your own creativity.

AI can also help you with things like art market research and identifying trends. This information can be incredibly valuable for artists who want to create pieces that are more likely to sell, as it can help them understand what their target audience is looking for and what kinds of pieces are likely to be most successful in the current market. By using AI to stay on top of trends and market demands, artists can ensure that their work remains relevant and appealing to buyers, and can maximize their chances of success in the competitive world of art sales.

AI Tools for Your Art Business

Ready to get started using AI for your art business? Below is a list of some awesome AI tools that can help streamline your workflow, gather market insights, and even generate new artwork ideas. Of course, there are plenty of other AI tools out there too – new ones are popping up all the time! But these are a great place to start.

  • Chat GPT – a language model which can be used for generating ideas, writing content, and answering questions.
  • CF Spark – generate new and unique artworks to inspire your own work.
  • Notion AI – to streamline your workflow and help you with writing.
  • Canva AI – uses AI to suggest design layouts and color schemes for social media and marketing graphics.
  • Adobe Sensei – Provides AI-powered features in Adobe Creative Cloud
a woman thinking about using AI for her business

Considerations When Using AI for Your Art Business

There’s no one answer for how to incorporate AI into your art business. It’s going to vary depending on what you’re selling, who your audience is, and your art business goals. But, there are some general guidelines you can follow to make sure you’re using AI in a way that aligns with your business and values.

Supplement, don’t replace, human interaction. Your art business is built on human relationships. Whether you’re selling to collectors or working with galleries, you need to be able to build and maintain personal relationships. Use AI to supplement your relationships, not replace them.

Automate tasks, but don’t allow it to make decisions for you. AI can be a great tool for automating tasks like customer follow-up or marketing emails. But it’s important to remember that AI can’t make decisions for you. When it comes to important decisions like pricing or what art to sell, you need to rely on your own judgment.

Use AI to enhance your artwork, not replace it. AI has the potential to be a powerful tool for artists, but it’s important to remember that it should be used to enhance your artwork, not replace it. While AI can help generate new ideas, identify trends, and speed up certain processes, it can’t replicate the unique creativity and vision of a human artist.

Keep an eye on the future. AI is always changing, and new tools and applications are being developed all the time. It’s important to keep an eye on the future and be prepared to adopt new AI tools as they become available. This will help you stay ahead of the competition and make sure you’re using the best AI tools for your business.

Conclusion

AI can be a powerful tool for artists and art businesses, but it is important to use it wisely. With AI, you can manage your marketing, track trends, find inspiration for new artwork, and conduct market research. But you need to be careful not to over automate or you could lose the human touch that makes your business special. The possibilities are endless, and with a bit of creativity, you can take your art business to the next level with AI tools.

What are your thoughts on AI and using it for your art business? Let me know in the comments below!

Cheers,

julie signing off

Custom Cover Photos on Zazzle: Make Your Products Stand Out

zazzle custom cover photos
custom cover photos on zazzle: make your products stand out

In this post I’m sharing a new feature on the print on demand website Zazzle, which is the ability to add your own custom cover photos to your listings! This is a really great way to make your listings stand out on the Zazzle marketplace.

* Please note, some links in this post are affiliate links. If you make a purchase using the links I may earn a commission at no additional cost to you. I appreciate your support and it helps me create more content for you to enjoy!

In a world filled with nearly identical products, it’s important to find ways to make your products stand out. Zazzle custom cover photos are one way to do this. With a little creativity, you can use cover photos to give your products a unique look and make them more reflective of your own brand.

Zazzle custom cover photos are easy to create and can be applied to any product via the individual product page. Cover photos can be changed at any time, so you can experiment with different looks to find the one that best represents your brand.

To learn more about the custom cover photos directly from Zazzle, read their cover photo landing page.

In the video below I demonstrate how to add custom cover photos to your listings, and how I’ve been designing them on my iPad. Aside from creating your own cover photos in Procreate or another app like Photoshop, you can also purchase or find free mockups for your listings on Placeit, Creative Market, Google and other websites.

A great way to make your products stand out from the competition.

When potential customers are browsing through all the different products on Zazzle’s marketplace, it’s the cover photo that will initially catch their eye. Therefore, it is important to have an eye-catching and visually appealing cover photo.

People are more likely to purchase a product if they are able to see what it looks like in a realistic setting. If you have a great product but are using unappealing or generic stock photos, then you are not doing your product justice. Take advantage of Zazzle’s custom cover photo feature to make your products stand out and attract more customers!

You can purchase a sample of your product and take your own photos of it, use a mock-up you’ve purchased, or create your cover photo in a graphic design software. Either way, adding a custom cover photo to your product will make it more eye-catching and likely to sell.

Use a variety of backgrounds and graphics to create a unique look for your product.

If you want your products to really stand out on Zazzle, you need to put some thought into your cover photos. Luckily, there’s a lot of flexibility when it comes to design. You can use a variety of backgrounds and graphics to create a unique look for your product.

The first thing you need to do is decide what kind of mood you want to create. Do you want something fun and whimsical? Or are you going for a more sleek and modern look? Once you’ve decided on the overall tone, you can start finding or creating some backgrounds and graphics. If you’re not sure where to start, take a look at what other people have done. See what kind of designs are popular and see if you can find any inspiration there. I’ve personally been using my own photographs, and actually going out and finding textures and photographing them specifically for cover photos.

Also think about the real-life setting you might find the product being used in. For example, I used a sandy beach background for flip flops vs. a wall texture background for a clock.

zazzle custom cover photos for flip flops
custom zazzle cover photo clock mockup

Once you have a general idea of what you want your cover photos to look like, it’s time to start putting it all together. Remember, your cover photo is the first thing people will see when they come across your product. So make sure it’s something that will grab their attention and make them want to learn more. With a little effort, you can create a design that’s truly unique and will help your product stand out from the rest.

Keep your cover photos high quality and eye catching

There are a few things to keep in mind when creating custom cover photos for your products.

  1. Make sure the photo is high-quality and resolution. Zazzle recommends using a PNG or JPG file that is at least 300 DPI. This will ensure that your photo looks sharp and clear.
  2. Next, consider the size of the photo. You want to make sure that the photo is large enough, but not so big that it looks blurry or distorted. A good rule of thumb is to use a photo that is at least 1000 pixels wide.
  3. Finally, think about the background of the photo. You want to make sure that the background is simple and uncluttered so that your product is the main focus. A simple background, blurred photo or a contrasting solid color is usually best.

With these tips in mind, you can upload your own photos to create unique and eye-catching cover photos for your Zazzle products.

Conclusion

There are a few things to keep in mind if you want to use custom cover photos to make your products stand out. First, you want to make sure the cover photo is high-quality and fits well with the product. Second, you want the cover photo to be unique and not like anything else that’s out there. And finally, you want to make sure the cover photo accurately represents the product. If you keep these things in mind, then you’re well on your way to using custom cover photos to make your products stand out on Zazzle.

I hope this post has inspired you to add custom cover photos to your Zazzle listings. Go ahead and give it a try – you may be surprised at the results!

Cheers,

julie signing off

How to Create a Brand Identity for Your Art Business

how to create a brand identity for your art business

When it comes to running a successful art business, a big part of standing out from the crowd is creating a strong and recognisable brand identity. But what does that actually entail? In a nutshell, your brand identity is how your business is perceived by both your current and potential customers. It’s more than just your logo or website design – it encompasses everything from your company values and mission statement, to your overall aesthetic and the way you communicate with your audience.

Luckily, creating a strong brand identity for your art business is not as daunting as it may seem. By following a few simple steps, you can develop a clear and recognisable brand that will help you to attract and retain customers.

art business toolkit branding and marketing

Define your art business and what it does

An art business is anything that involves creating, marketing, and selling art. This could be anything from fine art to digital art to craft supplies. To create a brand identity for your art business, you need to first define what exactly your business does and what makes it unique.

One way to do this is to sit down and brainstorm what your business offers and what makes it different from other businesses in the same industry. For example, if you sell paintings, what makes your paintings different from others? Do you have a specific style or focus on a certain type of painting? Who is your target market?

Once you have a good understanding of what your business does and what makes it unique, you can start to create a brand identity that reflects this. This can be anything from creating a logo and tagline to choosing a colour scheme and overall aesthetic for your business.

Whatever you do, make sure that your brand identity is cohesive and reflects the overall tone of your business. Creating a brand identity for your art business is an important step in making your business more visible and recognizable. By taking the time to define what your business does and what makes it unique, you can create a strong foundation for your brand that will attract new customers and help you stand out from the competition.

researching and developing a brand identity

Research your competition

When you’re ready to start creating a brand identity for your art business, it’s important to do your research and find out what similar businesses are doing. This will help you get an idea of what’s working well and what you can improve upon.

One of the best ways to research your competition is to simply search for them online. Check out their websites and social media pages to see what they’re doing right. Make a list of the things you like and the things you don’t like about their branding. This will help you narrow down your own preferences and come up with a brand identity that’s unique to you.

Another great way to research your competition is to talk to them directly. If you know any other artists or art business owners, reach out to them and ask for their advice. They may be willing to share their own experiences and help you avoid making the same mistakes they did.

Finally, don’t forget to ask your customers for feedback. They’re the ones who will be interacting with your brand identity the most, so it’s important to get their thoughts on what you’re doing. Send out surveys, post on social media, or simply ask them in person what they think of your brand. By doing your research, you’ll be able to create a brand identity that’s unique, appealing, and sure to attract more business.

an artist figuring out their brand identity

Find your niche and focus on what makes you different

When it comes to creating a brand identity for your art business, it’s important to find your niche and focus on what makes you different. This can be a difficult process, but it’s worth taking the time to figure out what sets your business apart from the rest.

One of the best ways to find your niche is to think about what you’re passionate about. What are the specific areas of art that you’re most interested in? What do you enjoy creating the most? Once you’ve identified your passions, you can start to focus on creating a brand identity that reflects those interests.

It’s also important to focus on what makes you different from other art businesses. What are your unique selling points? What can you offer that no one else can? By highlighting these differences, you’ll be able to create a brand identity that really stands out.

Finally, don’t be afraid to be bold with your brand identity. This is your chance to really put your own personal stamp on your business. So go ahead and be creative! Use your brand identity to show the world who you are and what you’re all about.

artist mission statement as part of their brand identityyyyy

Create a mission statement for your brand

Creating a mission statement for your brand is a good place to start shaping your brand identity. This statement should be a clear and concise description of what your business is and what it stands for. It should be easy to understand and remember, so that your customers can quickly identify with your brand.

Your mission statement should be reflected in everything you do, from the products you sell to the way you market your business. It should be an integral part of your brand identity and should be communicated to everyone who comes into contact with your business.

If you take the time to create a strong and clear mission statement for your brand, you will be well on your way to creating a successful and recognizable brand identity.

Mission statement examples for an artist’s brand:

  • To create art that evokes emotion, inspires creativity, and encourages a deeper appreciation for beauty in the world.
  • To use my artistic talents to shed light on social issues and promote positive change in the world.
  • To connect with audiences on a deep, personal level through my art, and inspire them to find their own creativity and passion.
  • To bring joy and happiness to people’s lives through my colourful and whimsical artworks.
  • To use my art as a platform to raise awareness about environmental issues and promote sustainability.
  • To capture the beauty of nature and the human experience through my paintings, and share it with the world.
  • To create art that transcends language and cultural barriers, bringing people together through the universal language of beauty.
  • To inspire and empower women through my art, celebrating their strength, resilience, and unique beauty.
achievement apple computer connection

Develop a visual identity for your brand

As an artist, one of the most important things you can do is develop a strong visual identity for your brand. Your visual identity is what will help you stand out from the crowd and attract attention from potential customers and clients. This includes your brand colours, logo, banners, avatars, social media posts and more.

Here are five tips to help you create a visual identity for your art business:

1. Define your brand. What are your core values and attributes? What makes you unique? Once you have a clear understanding of your brand, you can start to develop a visual identity that reflects who you are as a business.

2. Consider your target audience. Who are you trying to reach with your art business? What kinds of visuals, colours, textures etc. will resonate with them? When you know your target audience, you can create visuals that appeal to them.

3. Keep it simple. When it comes to visuals, less is often more. You want to create a simple, elegant visual identity that is easy for people to remember.

4. Use high-quality visuals. The visuals you use should be high-resolution and professional-looking. This will help you create a strong impression and build trust with your target audience.

5. Stay consistent. Once you have developed your visual identity, it is important to stay consistent with it. Use the same colours, fonts, and overall look and feel across all of your marketing materials. This will help people easily recognize your brand.

Check out this Skillshare class DIY Branding for Creatives to help you design a visual identity for your brand!

happy woman doing painting

Monitor and adjust your brand identity as needed

Like any business, it’s important to regularly monitor how your art brand is performing and make changes and re-iterate as needed.

Here are a few tips:

1. Keep an eye on your sales. If you’re not selling as much as you’d like, it could be a sign that your brand identity isn’t resonating with your target audience. Take a look at your branding and see if there’s anything you could change to better appeal to your desired customers.

2. Pay attention to your online presence. What are people saying about your brand? Are they sharing your content? If not, it could be a sign that your brand identity isn’t strong enough. Again, take a look at your branding and see if there’s anything you could change to make a bigger impact.

3. Monitor your competition. See what they’re doing that’s working and try to replicate it. But also, be sure to differentiate yourself from the competition so you’re not just another “me too” art brand. By regularly monitoring your brand identity and making changes as needed, you’ll be sure to stay ahead of the game and keep your art business thriving.

4. Update your branding regularly. It may take some re-iterating until you’ve reached a point where you feel like your brand truly reflects you and your art business.

Conclusion

Creating a brand identity doesn’t have to be complicated or expensive. By following the steps outlined in this article, you can create a professional and unique brand identity for your art business that will help you stand out from the competition. With a little time and effort, you can develop a strong brand that will attract new customers and help grow your business.


Cheers,

julie signing off