
Hey there, welcome to my blog! In this post, I’m excited to share with you how to design your own wedding invitation suite with Zazzle.
It was an incredible opportunity as Zazzle reached out to me to create a video for their YouTube channel, where I could showcase the process of creating my own wedding invitations that beautifully represent my wedding theme.
Join me as I walk you through the steps, tools, and inspiration behind this creative journey in the video below.
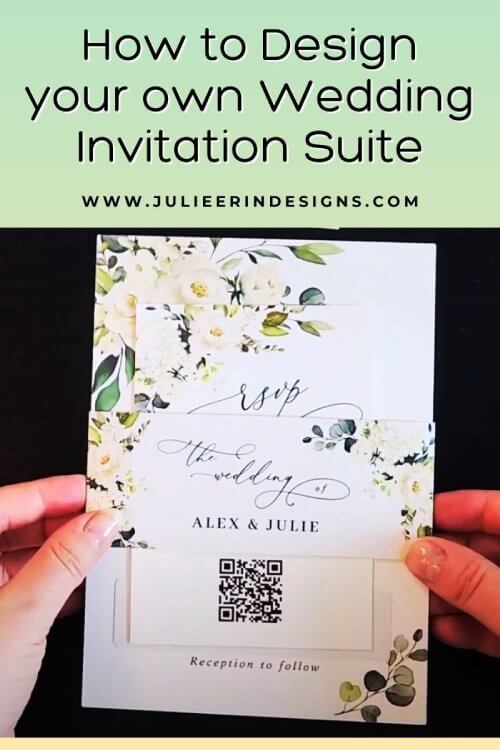
How to Design your own Wedding Invitation Suite
To get started, I made a list of all the items I needed to assemble my wedding invitation suite.
From the main invitation and RSVP cards to belly bands, custom envelopes, stickers, and more, Zazzle had everything I needed to bring my vision to life.
For design inspiration, I turned to my curated wedding Pinterest board, where I have been gathering ideas and inspiration for the overall theme and style I want for my wedding.
Items needed for the invitation suite:
All of the items I used for my invitation suite are linked below, with the exception of the return address labels which I creating using the “Design Transfer” option. This is demonstrated in the video above.
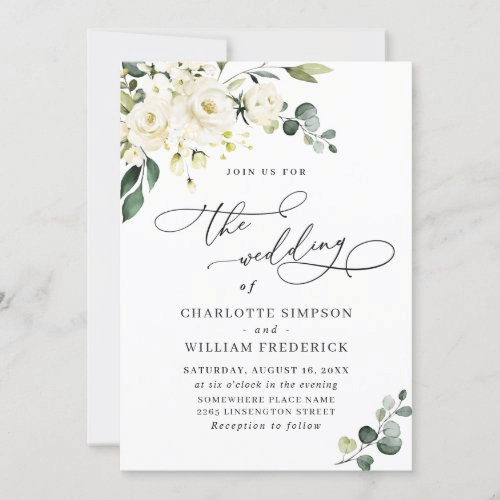
Using Zazzle’s Design Tool, I was able to customize every aspect of my invitations including the colors, fonts, and layouts to achieve the exact look I envisioned. Plus, I could select different paper types and sizes to ensure my invitations looked exactly how I wanted.
Digital Download or Physical Products
When it came to acquiring my customized invitations, I opted for the printed version. However, it’s worth mentioning that Zazzle’s digital download option is a great cost-saving alternative, and offers flexibility if you prefer to send your invitations electronically via text or email. It’s a modern, eco-friendly approach that still ensures your invitations look stunning while accommodating different preferences and budgets.
Putting the Invitation Suite Together
Once all of the different pieces arrived, it was time to put it all together. You can watch the process of putting together the invitation suites in the video above.
I started with the main invitation and then put the RSVP card on top. Attaching the belly band neatly held the components together, creating a cohesive suite. Adding custom stickers and return address labels to the envelopes added that extra touch of personalization. Lastly, I used an embosser to add a custom touch to the envelopes.
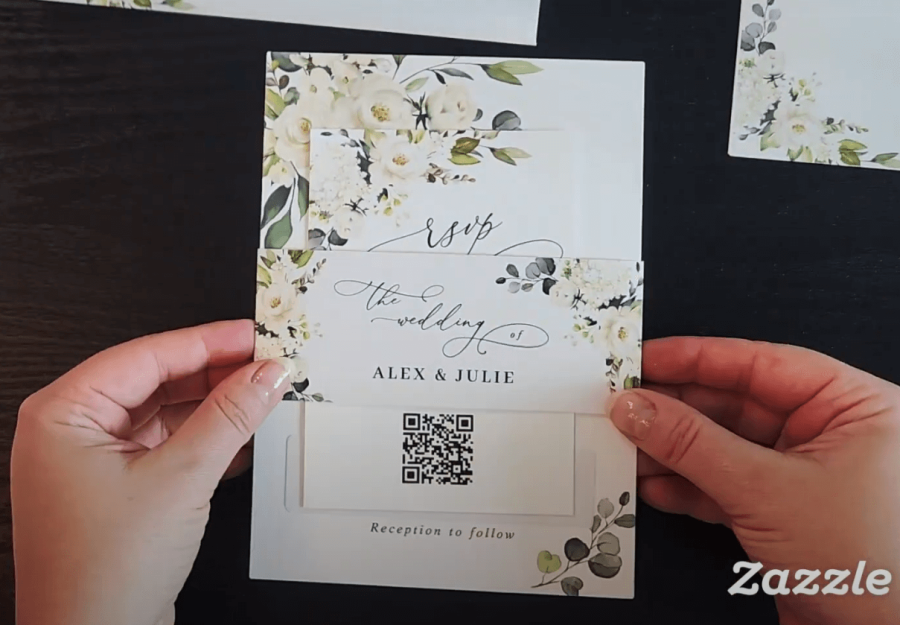
The Finished Product
I’m very happy with the finished result. Each invitation showcases our unique style and attention to detail. The suite truly sets the tone for our special day and leaves no doubt that our wedding will be an unforgettable event.
My friends and family loved these wedding invitations and said they would keep them as cherished mementos for years to come!
Conclusion
Designing your own wedding invitations with Zazzle was a fun and rewarding experience. It allowed me to bring my vision to life and create invitations that were exactly how I wanted.
Zazzle’s affordability, convenience, and customization options made it the perfect choice for this creative endeavor. If you’re seeking personalized wedding stationery that stands out from the crowd, I encourage you to explore the possibilities on Zazzle’s website.
I hope this post has inspired you to design your very own wedding invitation suite.
If you want to learn more about selling your own designs through Zazzle, check out this post: Sell your Art on Zazzle: A Step by Step Guide to Setting up Your Zazzle Store.
Thanks for joining me, and feel free to leave any comments or questions below. Happy designing!
Cheers,


0 Comments