
Are you an artist on Zazzle looking to increase your sales? Well then you’re in the right place because today I’m sharing 5 tips to help you improve your Zazzle store. I’ve seen an increase in sales and also my “zRank” went up by 2 points after implementing these tips.
Completely new to Zazzle? Then you may be interested in my Skillshare class: Sell Your Art Online with Zazzle: A Complete Guide to Setting up Your Zazzle Store
You can either watch the video below or scroll down to read my 5 tips to help increase your sales on Zazzle.
5 Tips to Increase your Zazzle Sales
1. Fill out your Store and Profile to 100% Completion
When you are logged in to your Zazzle store you will see a section on the right that shows your zRank and store completion. Follow the prompts there until it reaches 100% with tasks including adding media images and creating collections.
This will also help increase your zRank.
2. Set up Categories for your Products
Categories are very important because it helps keep your store organized, but also helps your customers sort through your products.
“Home Decor” is an example of a category. You can also create subcategories, such as: “Home Decor > Pillows”. I suggest creating hierarchical categories like this. Think about it like a department store, if that helps you visualize how your products could be organized.
If you haven’t done this yet in your existing store, it is possible to set the categories later. It does take some more work, so try to organize your store well from the beginning or when you add a new product type to your shop.
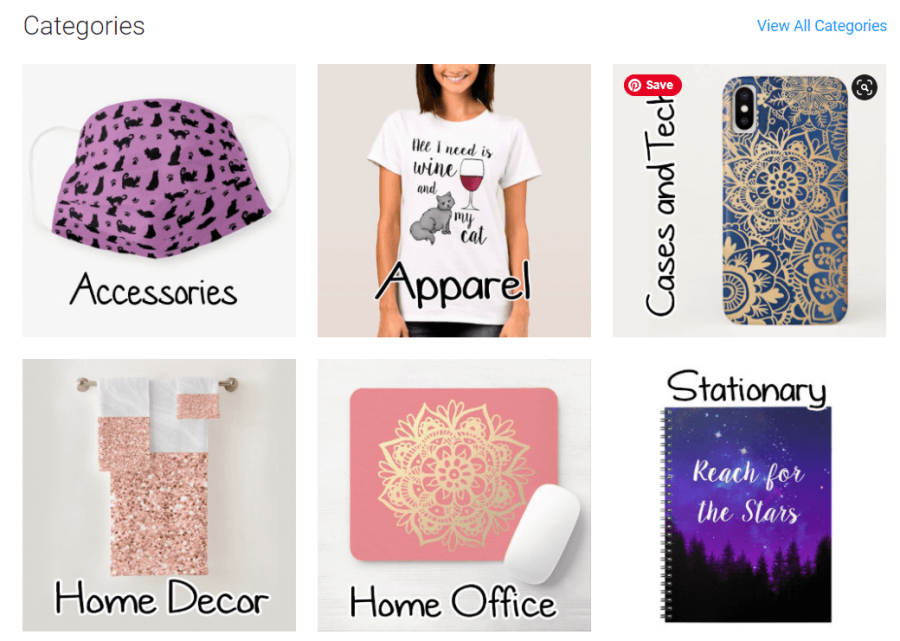
3. Add Categories to your Home Page
Create some custom images for the categories you’ve created, and then they will display on your store’s home page (you must enable this in the store settings).
You can switch these out to showcase different categories depending on the season, or what’s trending. Don’t go overboard with this, you don’t want to overwhelm your customer so keep it under 10 categories at a time.
Here is an example of the categories on my own home page:
4. Create Collections and add them to your Home page
Similar to categories, collections are another way to group products together. Collections sometimes show up on the product page of a product that is in that collection, so you want to take advantage of this.
Make collections of either the same design or the same product type. You could also make collections of products that go together like bathroom or bedroom sets.
Like categories, your collections can be also showcased on your home page and switched up depending on the season or trends.
Confused about the difference between collections and categories? I’ve got a video where I explain all of that!
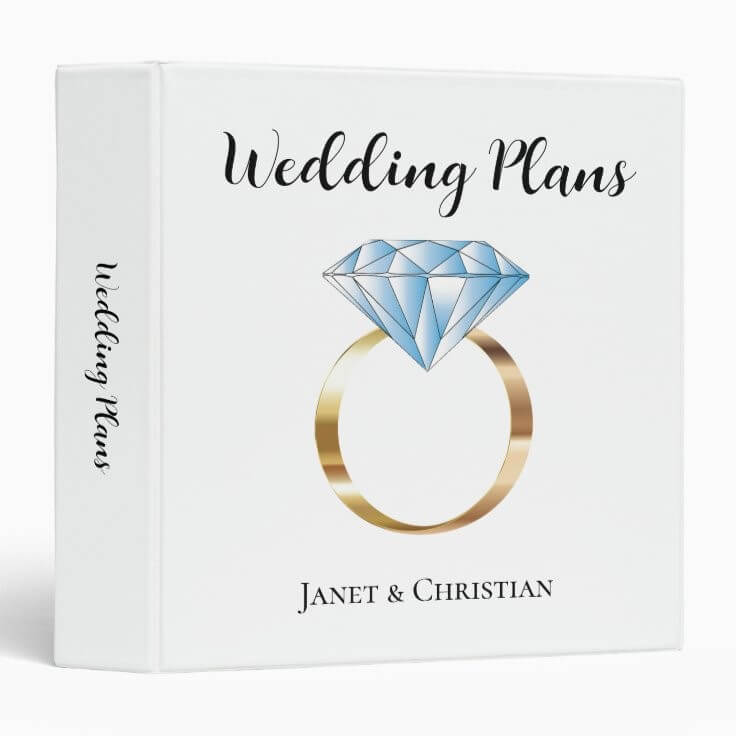
5. Create Customizable Products
Quite often people come to Zazzle to find unique, customize-able products. Products like business cards, invitations, and greeting cards sell very well on there.
But, people also like other types of personalized items like shirts or cell phone cases with their (or someone else’s) name on it, to make it extra special for themselves or a gift.
So consider creating more customize-able products for Zazzle like the example below. Make sure to set the text as a template and test it out before publishing the product to make sure it works and fits both long and short names.
Bonus Pro Tip
Add custom mockups to your listings. This is a new feature that Zazzle has introduced which allows you to add a custom mockup or “cover photo” to make your design really stand out in the marketplace! Read more about this feature here.
You can use a mockup generating service like Place It to create fun and unique mockups of your designs to take advantage of this feature.
I’ve also created a Skillshare class where I show you how to make custom cover photos using Canva and AI!
Conclusion
I hope some of these tips are new and helpful for you. Try implementing them next time you upload to Zazzle and see what happens! Nothing is guaranteed but it never hurts to try and always be improving your store and organization.
I’ve also got a trick to help you upload to Zazzle quicker, since I know it can be a tedious process. I demonstrate it in this video:
Make sure to follow my blog so you never miss my latest print on demand tips and tricks! I’m always sharing new strategies I learn along my journey of making an income from my art with print on demand websites like Zazzle. Keep up with my latest blog posts by joining my newsletter!
I hope you found this post useful. Please share any other Zazzle tips you have in the comments below!
Cheers,


0 Comments